UITextViewで独自のEdit Menuを表示する


実行環境
- Xcode 14.2
- iOS 16
iPhoneのメモアプリで、テキストを長押しすると出てくるメニュー。
あれを自分で作るにはどうすればいいのかを調べてみました。
そもそもあのメニューの名前はなんだろうと調べたところ、Human Interface GuidelinesにはEdit Menuという名前で紹介されていました。

Edit Menuの表示
さて、このEdit Menu、UITextViewならデフォルトで表示されるようです。
ということでSwiftUIで表示するサンプルコードを書いてみました。
struct TextEditor: UIViewRepresentable {
    typealias UIViewType = UITextView
    typealias Coordinator = TextEditCoordinator

    @Binding var editText: String

    func makeUIView(context: Context) -> UITextView {
        let textView = UITextView()
        textView.isSelectable = true
        textView.isEditable = true
        textView.text = editText
        textView.delegate = context.coordinator
        return textView
    }

    func updateUIView(_ uiView: UITextView, context: Context) {}
}
UIViewRepresentableでUITextViewをSwiftUIで表示するコードです。
makeUIViewメソッドでUITextViewを作成します。
isSelectableとisEditableをtrueにすることで、選択可能で編集可能なテキストビューを作成します。
これだけでテキストを長押しするとEdit Menuが表示されるテキストビューが作成可能です。
独自のメニューを表示
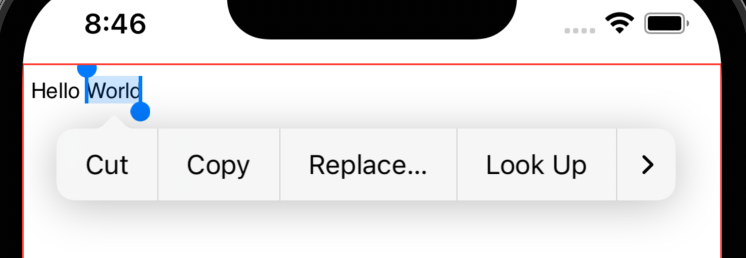
デフォルトのEdit Menuでは以下の項目が表示されます。
- Cut
- 選択文字をカットする
- Copy
- 選択文字をコピーする
- Replace...
- 選択文字を置き換える
- Look Up
- 選択文字を調べる
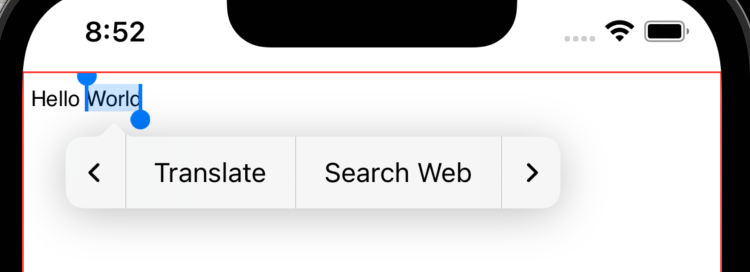
- Translate
- 選択文字を翻訳する
- Search Web
- 選択文字をWebで検索する
- Share...
- 選択文字を共有する
自分で独自のメニューを表示したい場合はどうすればいいでしょうか?
iOS 16からUITextViewDelegateのtextView(_:editMenuForTextIn:suggestedActions:)を使うとハンドリングできます。
struct TextEditor: UIViewRepresentable {
    func makeCoordinator() -> Coordinator {
        return TextEditCoordinator()
    }
}

final class TextEditCoordinator: NSObject, UITextViewDelegate {
    func textView(_ textView: UITextView, editMenuForTextIn range: NSRange, suggestedActions: [UIMenuElement]) -> UIMenu? {
        let customMenu = UIMenu(
            title: "uimenue",
            options: .displayInline,
            children: [
                UIAction(title: "menuItem1") { _ in
                    print("menuItem1")
                },
                UIAction(title: "menuItem2") { _ in
                    print("menuItem2")
                },
                UIAction(title: "menuItem3") { _ in
                    print("menuItem3")
                }
            ]
        )
        return UIMenu(children: suggestedActions + [customMenu])
    }
}
TextEditorにmakeCoordinatorを追加してUITextViewDelegateを準拠したクラスTextEditCoordinatorを返すようにします。
TextEditCoordinatorでtextView(_:editMenuForTextIn:suggestedActions:)を実装します。
suggestedActionsに標準のEdit Menuのデータが入っています。
独自のUIMenuとしてcustomMenuを作成し、suggestedActionsを含めて値を返せば、標準のEdit Menuに追加で独自のメニューを表示することができます。
UIMenuを作成する際のoptionsパラメーターは主にdisplayInlineとdestructiveの2つがあります。違いを見ていきましょう。
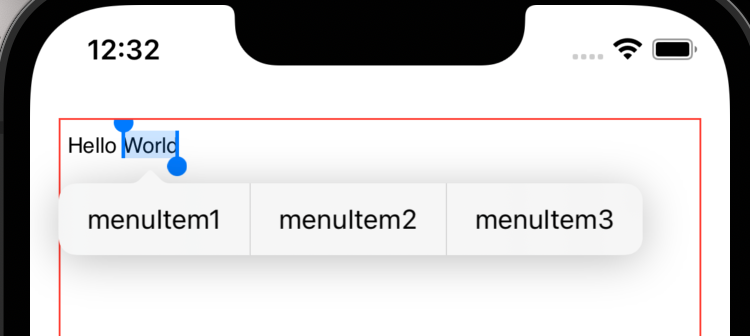
displayInline
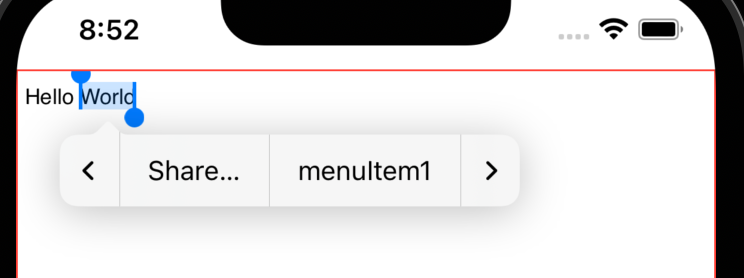
displayInlineはインラインでメニューを表示する方式です。
childrenで作成したUIActionが横並びで表示されます。
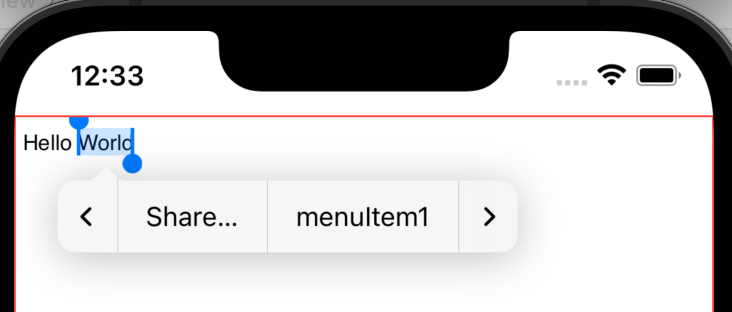
キャプチャではmenuItem1が見えていますが、メニューを横にスライドするとmenuItem2とmenuItem3が見えてきます。
タップするとそれぞれのUIActionのクロージャーが呼ばれます。
destructive
destructiveはメニューを階層的に見せる方式です。
UIMenuのtitleパラメーターの名前の親メニューが表示され、タップするとchildrenで作成したUIActionがメニューとして表示されます。

ここのuimenueをタップすると、
menuItem1、menuItem2、menuItem3が表示されます。
サンプルコード
サンプルコードをGistに上げました。参考にしてください。
 262588213843476
宣伝
BOOTHより、同人版「Swift Concurrency入門」発売中です。
Swift Concurrencyを網羅的に学べ、さらに既存アプリへの適応方法も解説しています。
日本語で体系的に学べる解説本は他になかなかありません。
1章、2章が立ち読みできるおためし版もありますので、ぜひチェックしてください!