Auto Layoutをコードから使おう

Auto LayoutによるビューのレイアウトはStorybordのGUIで設定できますが、もちろんコードからもAuto Layoutは設定できます。
コードでAuto Layoutができるようになれば、コンテンツをサーバーから取得して動的にレイアウトができるようになり、アプリ制作の幅がさらに広がります。
ただStoryboardでGUIからレイアウトするのとは異なり、コード特有の設定がいくつかありますので1つずつ見ていきましょう。
コードでAuto Layout
コードでAuto Layoutを設定する流れは以下です
- ビューを生成する
- translatesAutoresizingMaskIntoConstraintsをオフにする
- ビューを他のビューに配置
- ビューの制約を設定する
今回作るレイアウト
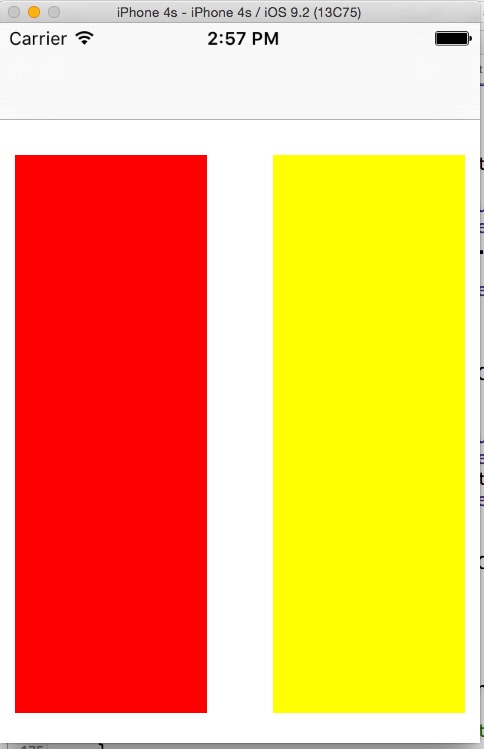
今回作るレイアウトは、以下のように赤いビューと黄色いビューを水平に並べるものを作りたいと思います。
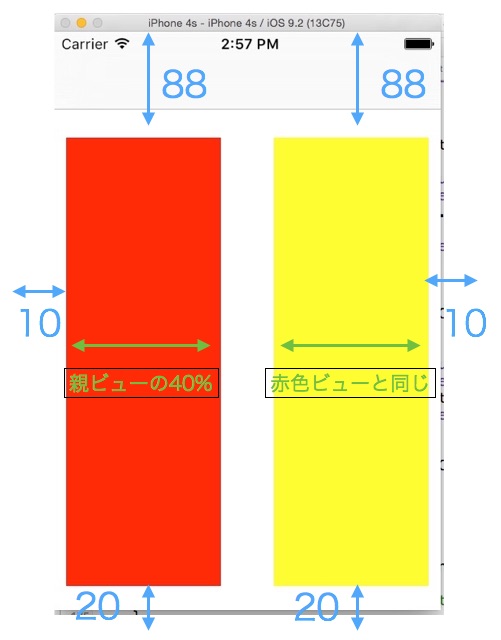
設定しようとしている制約もここでまとめておきます。
赤のビュー
- 上部と親ビューの上部の距離が88
- 左側と親ビューの左側の距離が10
- 下部と親ビューの下部の距離が20
- 幅が親ビューの幅の40%
黄色ビュー
- 上部と親ビューの上部の距離が88
- 右側と親ビューの右側の距離が10
- 下部と親ビューの下部の距離が20
- 幅が赤色ビューと同じ
図にするとこうなります。
ビューを生成する
それではさっそく、コードでAuto Layoutをしていきましょう。
新しいプロジェクトを作ります。
今回はCodeOfAutoLayoutViewController.swiftというファイルを作ってそこに、コードを書いていきたいと思います。
クラスのプロパティとしてredView、yellowViewを定義します。
UIViewの初期化メソッドinit(frame frame: CGRect) で生成しますが、この時、frameはCGRectZeroを指定して、大きさ、幅0のビューを生成しましょう。
フレームはあとでAuto Layoutで変化しますので、生成時は大きさ0のものを作れば大丈夫です。
//CodeOfAutoLayoutViewController.swift
let redView     = UIView(frame: CGRectZero)
let yellowView  = UIView(frame: CGRectZero)
translatesAutoresizingMaskIntoConstraintsをオフにする
生成したビューのプロパティにtranslatesAutoresizingMaskIntoConstraintsというものがあります。
これをオフにします。
このプロパティはAuto Layout以前に使われていた、Autosizingのレイアウトの仕組みをAuto Layoutに変換するかどうかを設定するフラグです。
デフォルトではオンになっていて、オンのままだと期待通りのAuto Layout設定ができない場合があるのでオフにします。
また、赤色ビュー、黄色ビューの見た目をわかりやすくするために、背景色をそれぞれ赤色、黄色を設定します。
//CodeOfAutoLayoutViewController.swift
override func viewDidLoad() {
    super.viewDidLoad()
    // Do any additional setup after loading the view, typically from a nib.


    redView.backgroundColor = UIColor.redColor()
    redView.translatesAutoresizingMaskIntoConstraints = false


    yellowView.backgroundColor = UIColor.yellowColor()
    yellowView.translatesAutoresizingMaskIntoConstraints = false

}
ビューを配置する
赤色ビュー、黄色ビューを親ビューに入れます。
//CodeOfAutoLayoutViewController.swift
override func viewDidLoad() {
    super.viewDidLoad()
    // Do any additional setup after loading the view, typically from a nib.


    redView.backgroundColor = UIColor.redColor()
    redView.translatesAutoresizingMaskIntoConstraints = false


    yellowView.backgroundColor = UIColor.yellowColor()
    yellowView.translatesAutoresizingMaskIntoConstraints = false


   self.view.addSubview(redView)//<-コードを追加
   self.view.addSubview(yellowView)//<-コードを追加

}
コードからAuto Layoutをする際の注意は、必ず、ビューを配置してから、ビューの制約を設定するということです。
それをしないと以下のようなエラーがでて、アプリがクラシュしてしまいますので気をつけましょう。
The view hierarchy is not prepared for the constraint:
今回は、viewDidLoad() でredViewとyellowViewを配置することにします。
ビューの制約を設定する
いよいよビューの制約を設定したいと思います。
NSLayoutConstraintクラスを使います。
Auto Layout をコードで設定するにはNSLayoutConstraintクラス
+constraintWithItem:attribute:relatedBy:toItem:attribute:multiplier:constant:
というメソッドを使う方法と「Visual Format Language」という記述方法で設定する方法の二通りがあります。
今回は、+constraintWithItem:attribute:relatedBy:toItem:attribute:multiplier:constant:メソッドで制約を設定していきたいと思います。
+constraintWithItem:attribute:relatedBy:toItem:attribute:multiplier:constant:の使い方をまずみてみます。
convenience init(item view1: AnyObject,
       attribute attr1: NSLayoutAttribute,
       relatedBy relation: NSLayoutRelation,
          toItem view2: AnyObject?,
       attribute attr2: NSLayoutAttribute,
      multiplier multiplier: CGFloat,
        constant c: CGFloat)
引数が多いので1つずつみていきます。
第一引数itemのview1は設定する要素を指定します。
第二引数attr1はview1で指定した要素の制約を設定する場所を指定します。
第三引数relationは制約を設定する2つの要素の関係性を指定します。
第四引数view2は基準となる要素を指定します。
第五引数attr2は基準となる要素の制約の場所を指定します。
第六引数multiplierは制約の割合の数値を指定します。
第七引数cは制約で追加する数値を指定します。
そして、これらの引数は以下の数式でも表せます。
もしrelationがイコールの場合、
view1.attr1 = view2.attr2 * multiplier + c
このメソッドを使って赤色のビューの上部と親ビューの上部の距離が88になるように設定するには以下のように書きます
    let redViewTopConstraint = NSLayoutConstraint(item: redView,
        attribute: NSLayoutAttribute.Top,
        relatedBy: NSLayoutRelation.Equal,
        toItem: self.view,
        attribute: NSLayoutAttribute.Top,
        multiplier: 1.0,
        constant: 88)

    self.view.addConstraint(redViewTopConstraint)
このように書けば、以下の様な数式で表せられる制約が追加されます。
redView.Top = self.view.Top * 1.0 + 88
赤色ビューのトップは親ビューのトップの値に1.0をかけて88を追加したものと同じです。つまり赤色ビューは親ビューの88ポイント下に配置されます
self.view.addConstraint(redViewTopConstraint)
を書いて、実際にself.viewに制約を追加するのを忘れずにしましょう。
同様に赤色ビューの左側を設定してみます。
    let redViewLeadingConstraint = NSLayoutConstraint(item: redView,
            attribute: NSLayoutAttribute.Leading,
            relatedBy: NSLayoutRelation.Equal,
            toItem: self.view,
            attribute: NSLayoutAttribute.Leading,
            multiplier: 1.0,
            constant: 10)

   self.view.addConstraint(redViewLeadingConstraint)
数式に直すと
redView.Leading =self.view.Leading * 1.0 + 10
となり、赤色ビューの左側が親ビューの左側の10ポイント右に配置されます。
赤色ビューの下部の設定です。
        let redViewBottonConstraint = NSLayoutConstraint(item: redView,
            attribute: NSLayoutAttribute.Bottom,
            relatedBy: NSLayoutRelation.Equal,
            toItem: self.view,
            attribute: NSLayoutAttribute.Bottom,
            multiplier: 1.0,
            constant: -20)
        self.view.addConstraint(redViewBottonConstraint)
数式に直すと
redView.Bootom = self.view.Bottom * 1.0 -20
→赤色ビューの下部を親ビューの下部の-20(上20ポイント)の距離に設定
赤色ビューの幅を設定します。
        let redViewWidthConstraint = NSLayoutConstraint(item: redView,
            attribute: NSLayoutAttribute.Width,
            relatedBy: NSLayoutRelation.Equal,
            toItem: self.view,
            attribute: NSLayoutAttribute.Width,
            multiplier: 0.4,
            constant: 0)

        self.view.addConstraint(redViewWidthConstraint)
数式に直すと
redView.Width = self.view.Width * 0.4 + 0
→赤色ビューの幅は親ビューの幅を40%の大きさに設定
黄色ビューも設定していきます。
上部の設定です。
        let yellowTopConstraint = NSLayoutConstraint(item: yellowView,
            attribute: NSLayoutAttribute.Top,
            relatedBy: NSLayoutRelation.Equal,
            toItem: self.view,
            attribute: NSLayoutAttribute.Top,
            multiplier: 1.0,
            constant: 88)
        self.view.addConstraint(yellowTopConstraint)
数式に直すと
yellowView.Top = self.view.Top * 1.0 + 88
→黄色ビューのトップは親ビューの88ポイント下に配置
黄色ビューの右側の設定は
        let yellowTrailingConstraint = NSLayoutConstraint(item: yellowView, attribute: NSLayoutAttribute.Trailing,
            relatedBy: NSLayoutRelation.Equal,
            toItem: self.view,
            attribute: NSLayoutAttribute.Trailing,
            multiplier: 1.0,
            constant: -10)
        self.view.addConstraint(yellowTrailingConstraint)
数式に直すと
yellowView.Trailing = self.view.Trailing * 1.0 - 10
→黄色ビューの右側を親ビューの右側の10ポイント左にずれたところに配置する
黄色ビューの幅を設定します。
        let yellowWidthConstraint = NSLayoutConstraint(item: yellowView,
            attribute: NSLayoutAttribute.Width,
            relatedBy: NSLayoutRelation.Equal,
            toItem: redView,
            attribute: NSLayoutAttribute.Width,
            multiplier: 1.0,
            constant: 0)
        self.view.addConstraint(yellowWidthConstraint)
数式に直すと
yellowView.Width = redView.Width * 1.0 + 0
→黄色ビューは赤色ビューと同じ幅を設定
黄色ビューの下部の設定をします。
    let yellowBottonConstraint = NSLayoutConstraint(item: yellowView, attribute: NSLayoutAttribute.Bottom,
            relatedBy: NSLayoutRelation.Equal,
            toItem: self.view,
            attribute: NSLayoutAttribute.Bottom,
            multiplier: 1.0,
            constant: -20)


    self.view.addConstraint(yellowBottonConstraint)
数式に直すと
yellowView.Bottom = self.view.Bottom * 1.0 -20
→黄色ビューは親ビューの下部より20ポイント上に配置されます。
実行
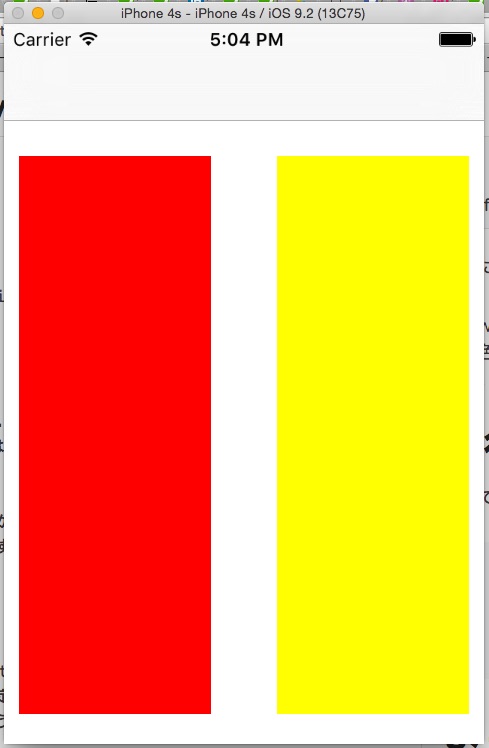
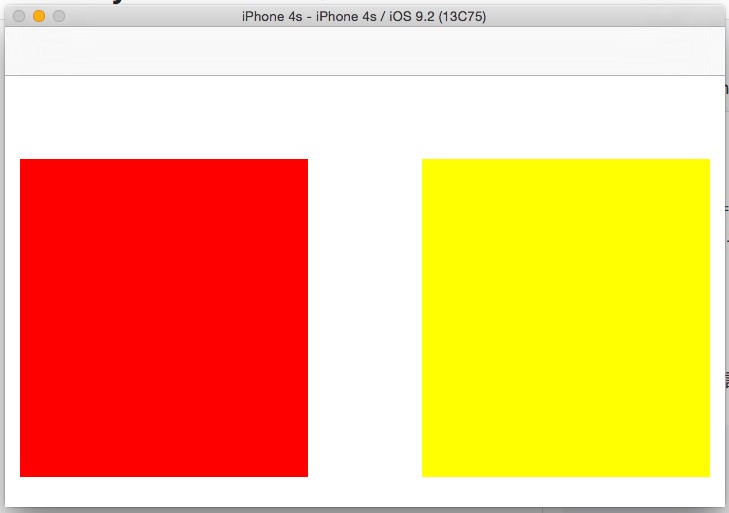
これでコードからの設定が終わりました。
実行してみます。
まとめ
コードからAuto Layoutを指定する方法をみてみました。
コードから指定できれば動的なレイアウトも可能になるのでぜひマスターしましょう。
今回は+constraintWithItem:attribute:relatedBy:toItem:attribute:multiplier:constant:メソッドを使っての指定でしたが、このメソッドを使うと、けっこうコードの量が多くなってしまうのがデメリットです。
記述量を少なくする方法には「Visual Format Language」という記述方法があります。
次回は「Visual Format Language」によるAuto Layoutについてみてみます。
サンプルコード
今回のサンプルコードは以下にあります。
https://github.com/SatoTakeshiX/AutolayoutTutorials
からプロジェクトをダウンロードして**「CodeOfAutoLayout」**をご確認ください。