Introducing SwiftUI: Building Your First App まとめ


WWDC19のビデオ、Introducing SwiftUI: Building Your First Appをまとめます。
Videoの概要
- 社内の会議室を一覧できるアプリを作成することを通してSwiftUIを使ったアプリの開発の流れを紹介
- Xcodeのプレビュー機能の紹介
- コードとキャンバスがシームレスに同期する
- キャンバスで変更加えたものはコードも変更される
- コードでビューに対して⌘+クリックすることでHStack/VStackをEmbedしたり、Extract viewとしてビューを切り分けたりできる
- 切り分けたビューを組み合わせて画面遷移を作る方法の解説
- @Stateを使ったzoomedプロパティで画像のズームをタップで切り替える
- Source of Truth(単一データソース)とDerived Value(派生データソース)
- 依存関係の管理は難しい
- 値を変えたとき、あるビューには反映され、他はされないといった矛盾が起こる可能性がある
- 従来(UIKit/AppKit)の開発は値が更新された後ビューに反映するのは開発者だった
- View Controllerとモデルデータには複雑な依存関係がある
- 複雑度が人間のキャパシティを超えたところにバグが生まれる
- SwiftUIの@Stateで値が更新されたらビューを自動に更新する機能があるので依存関係のバグを減らせる
- SwiftUIは自動で国際化やダークモードに対応する
- プレビューで確認できる
- アラビア語をインプットして国際化、文字の向きのデモをする
- ダークモードにする
- プレビューで確認できる
- SwiftUIを使うと基本機能の開発時間が少なくなりよりユーザーを楽しませる素晴らしい機能の開発に時間を割くことができるようにできる
Vieoの見どころピックアップ
私自身がいいなとおもったところをピックアップします。
Xcodeのキャンバス機能
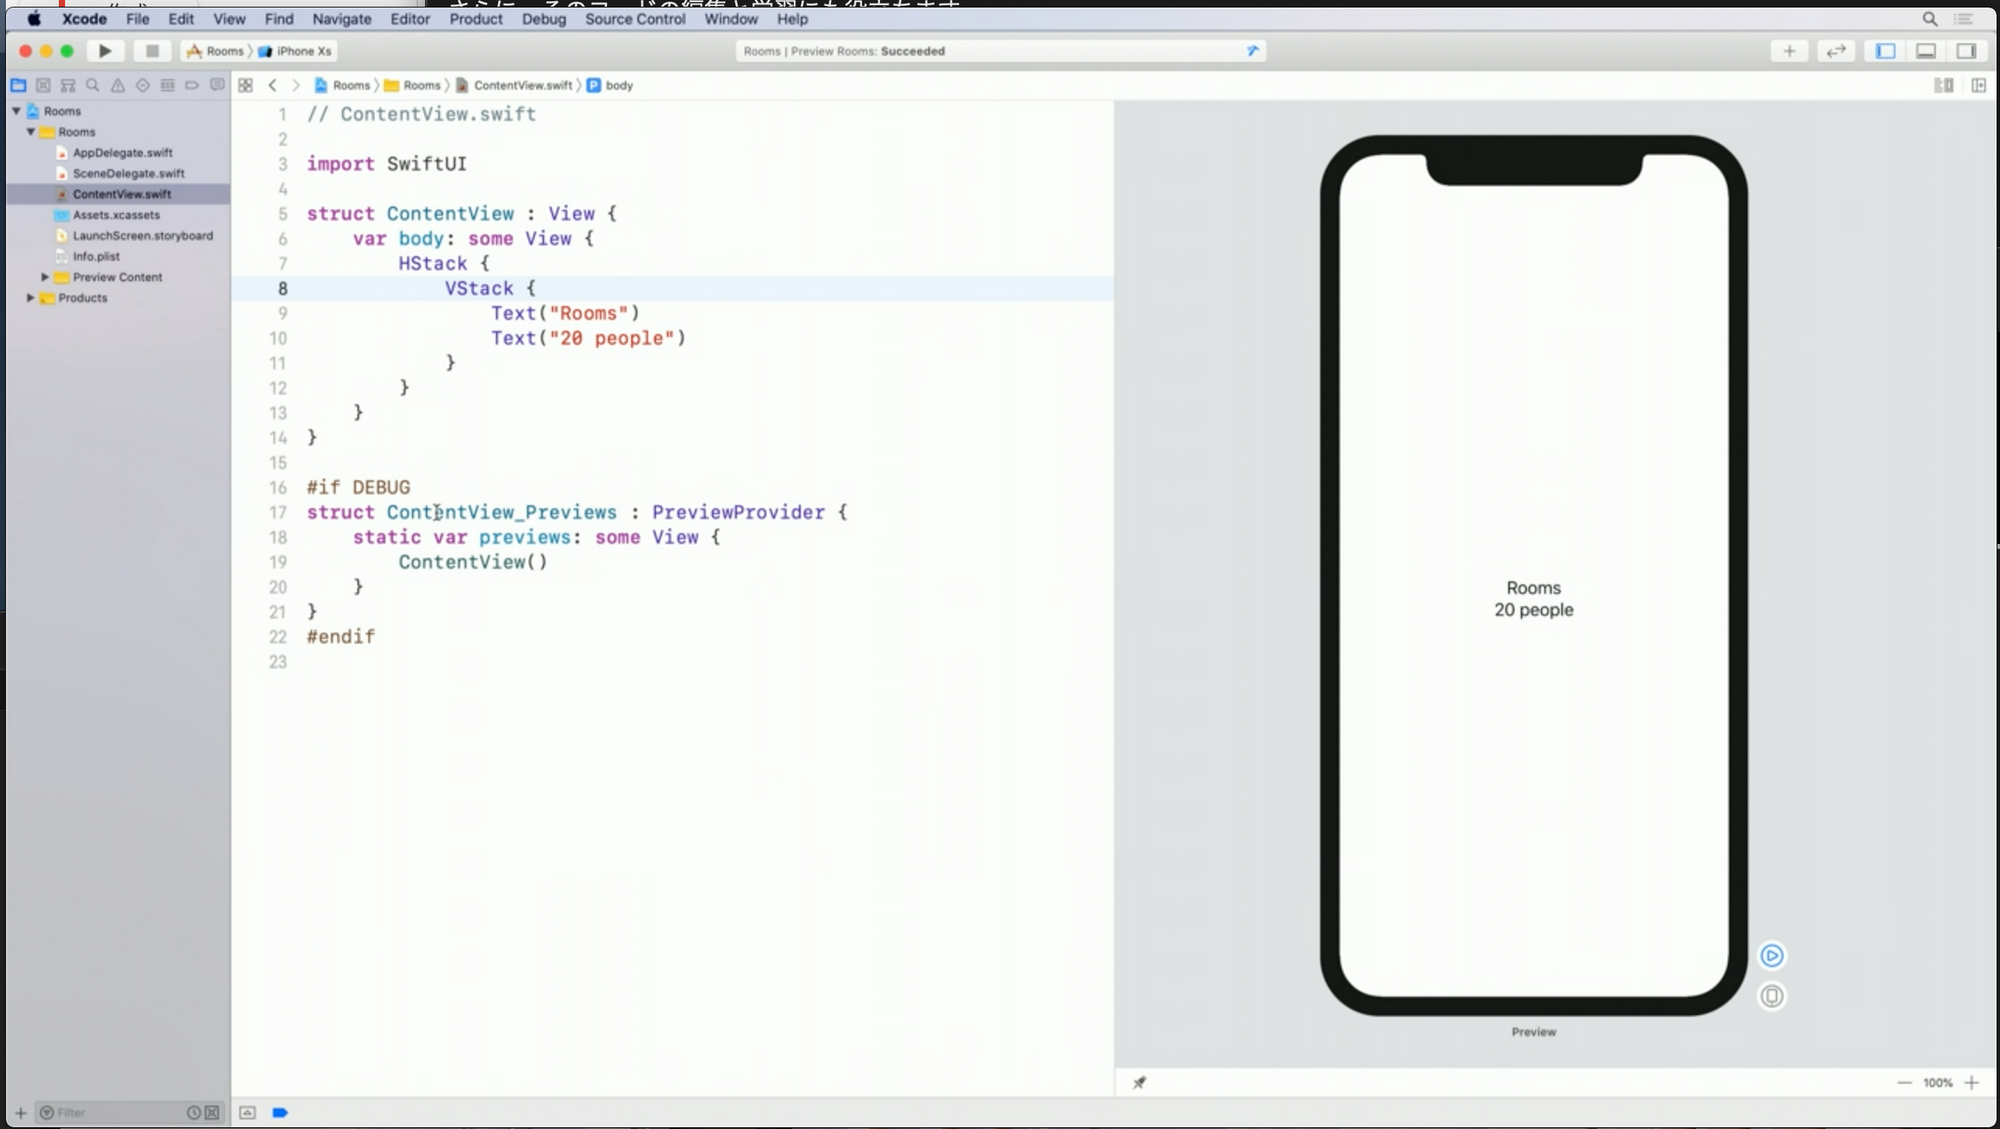
SwiftUIにチェックを入れてXcodeプロジェクトを作成するとこのような画面が出てきます。

左にコード、右にキャンバスが配置されています。
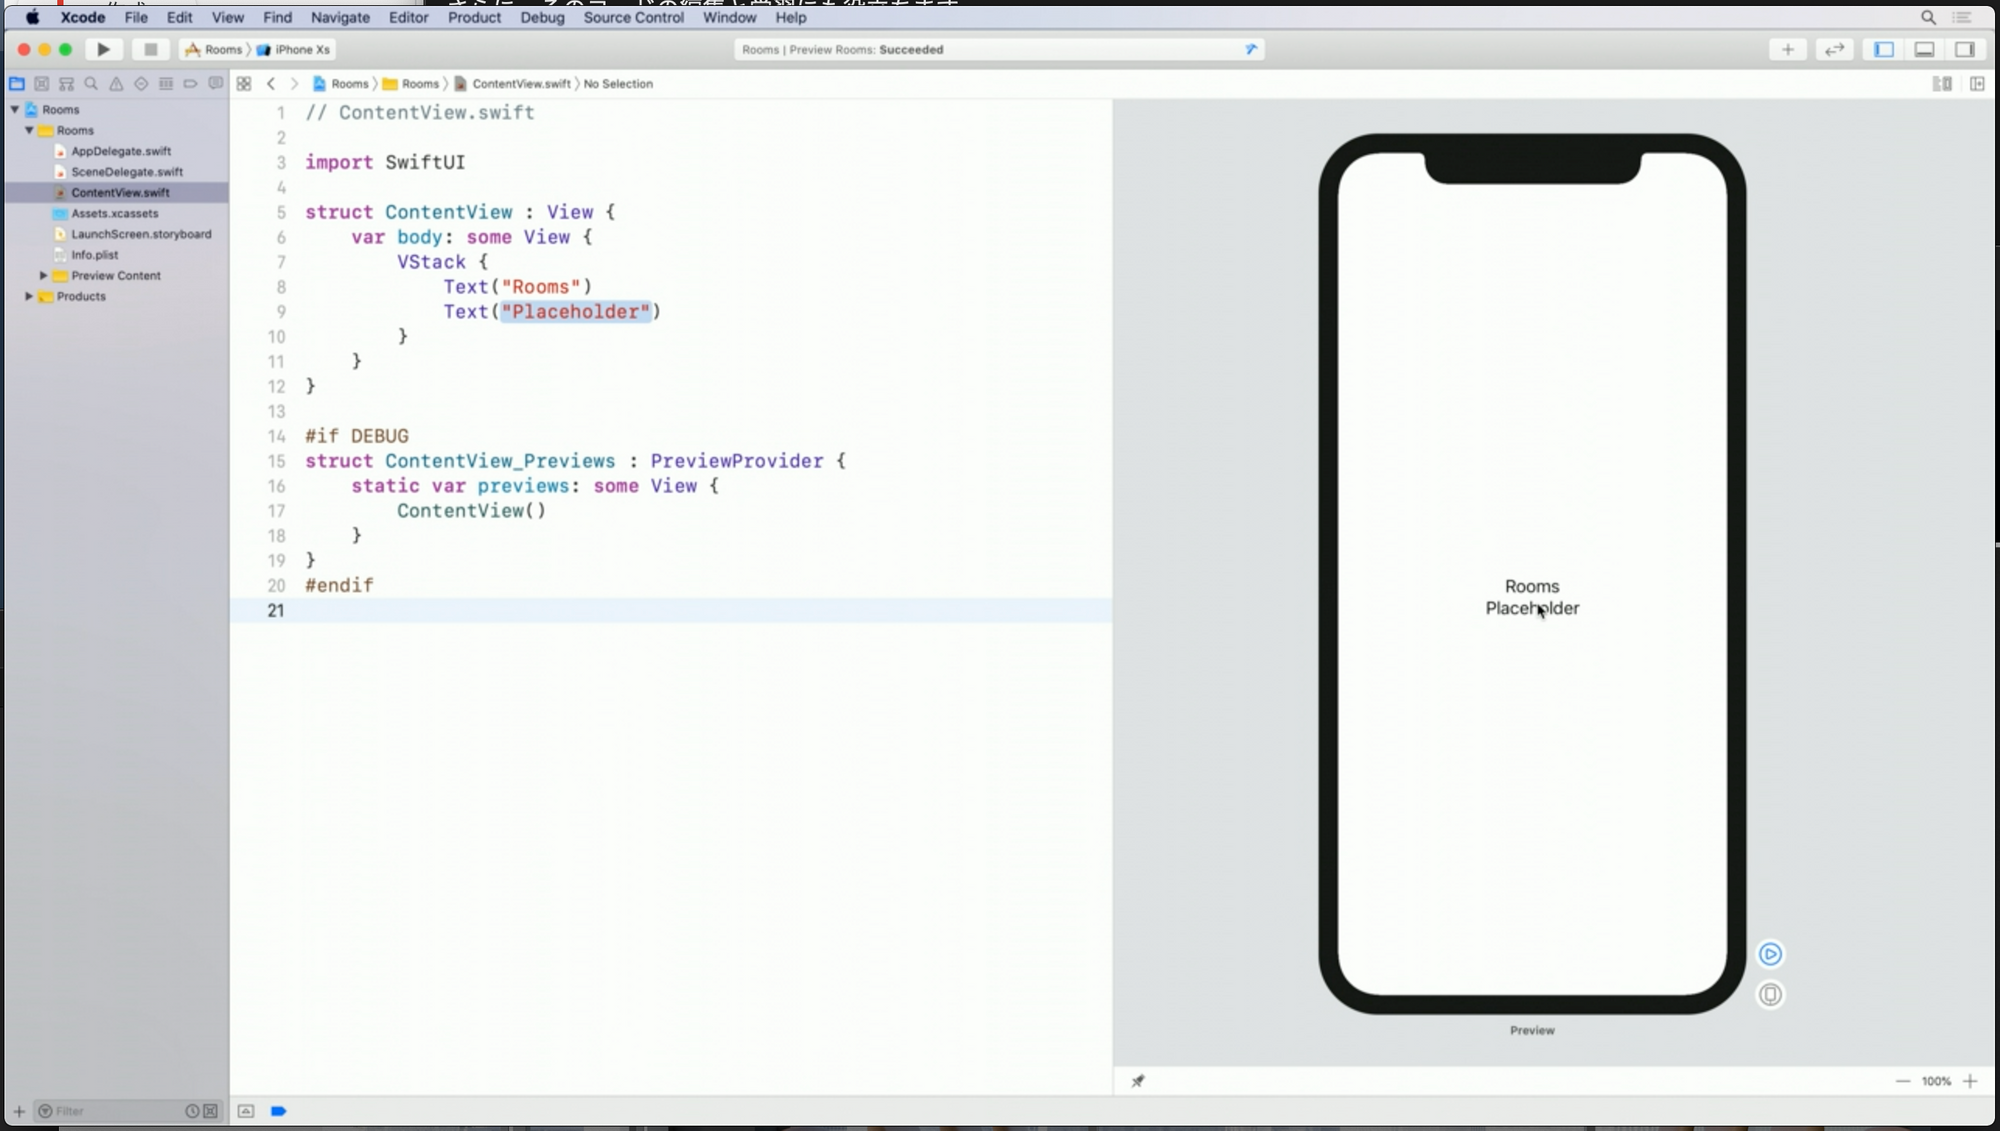
左のコードを更新するとキャンバスにも反映される。
Text(Rooms)に変えるとキャンバスもRoomsに文字が変更されます。
キャンバスの使い方。
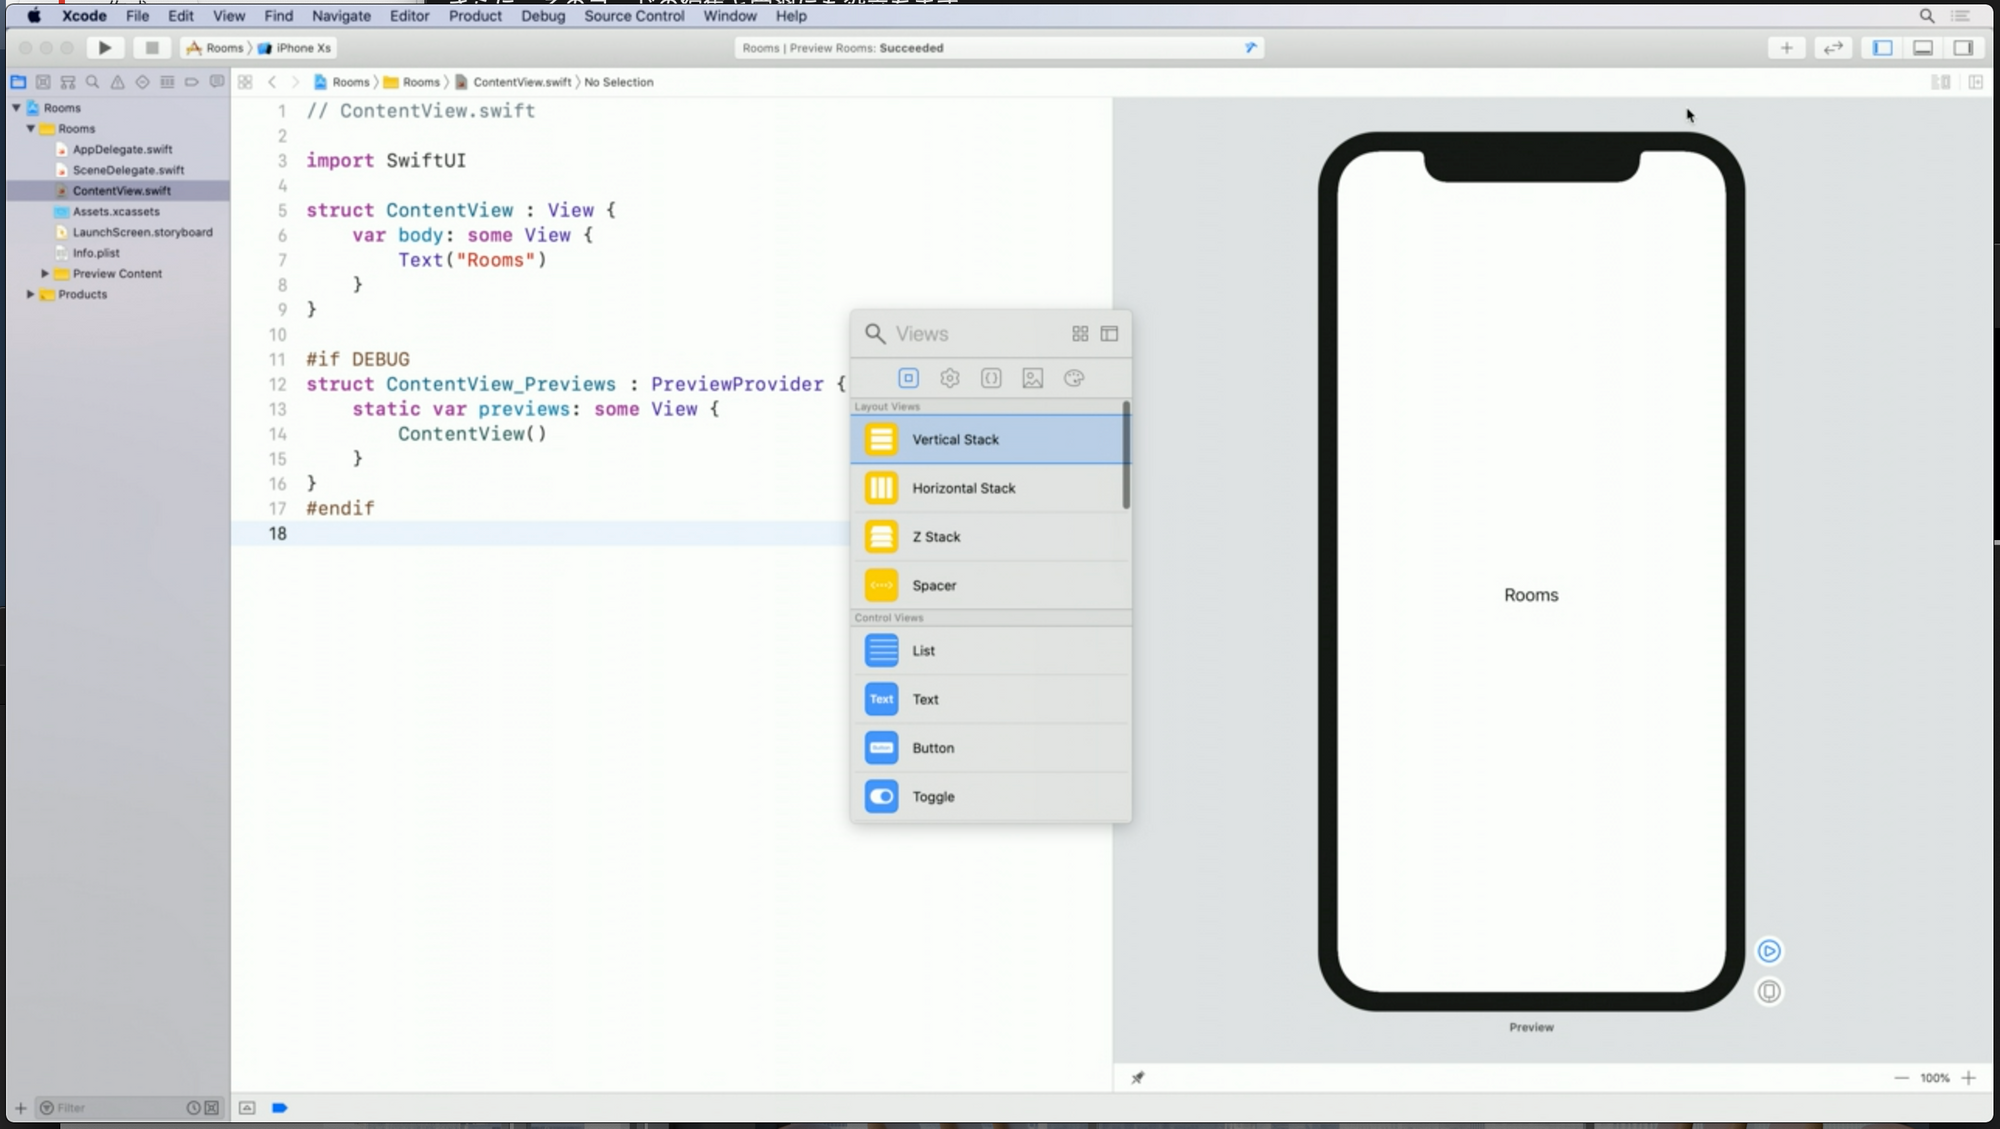
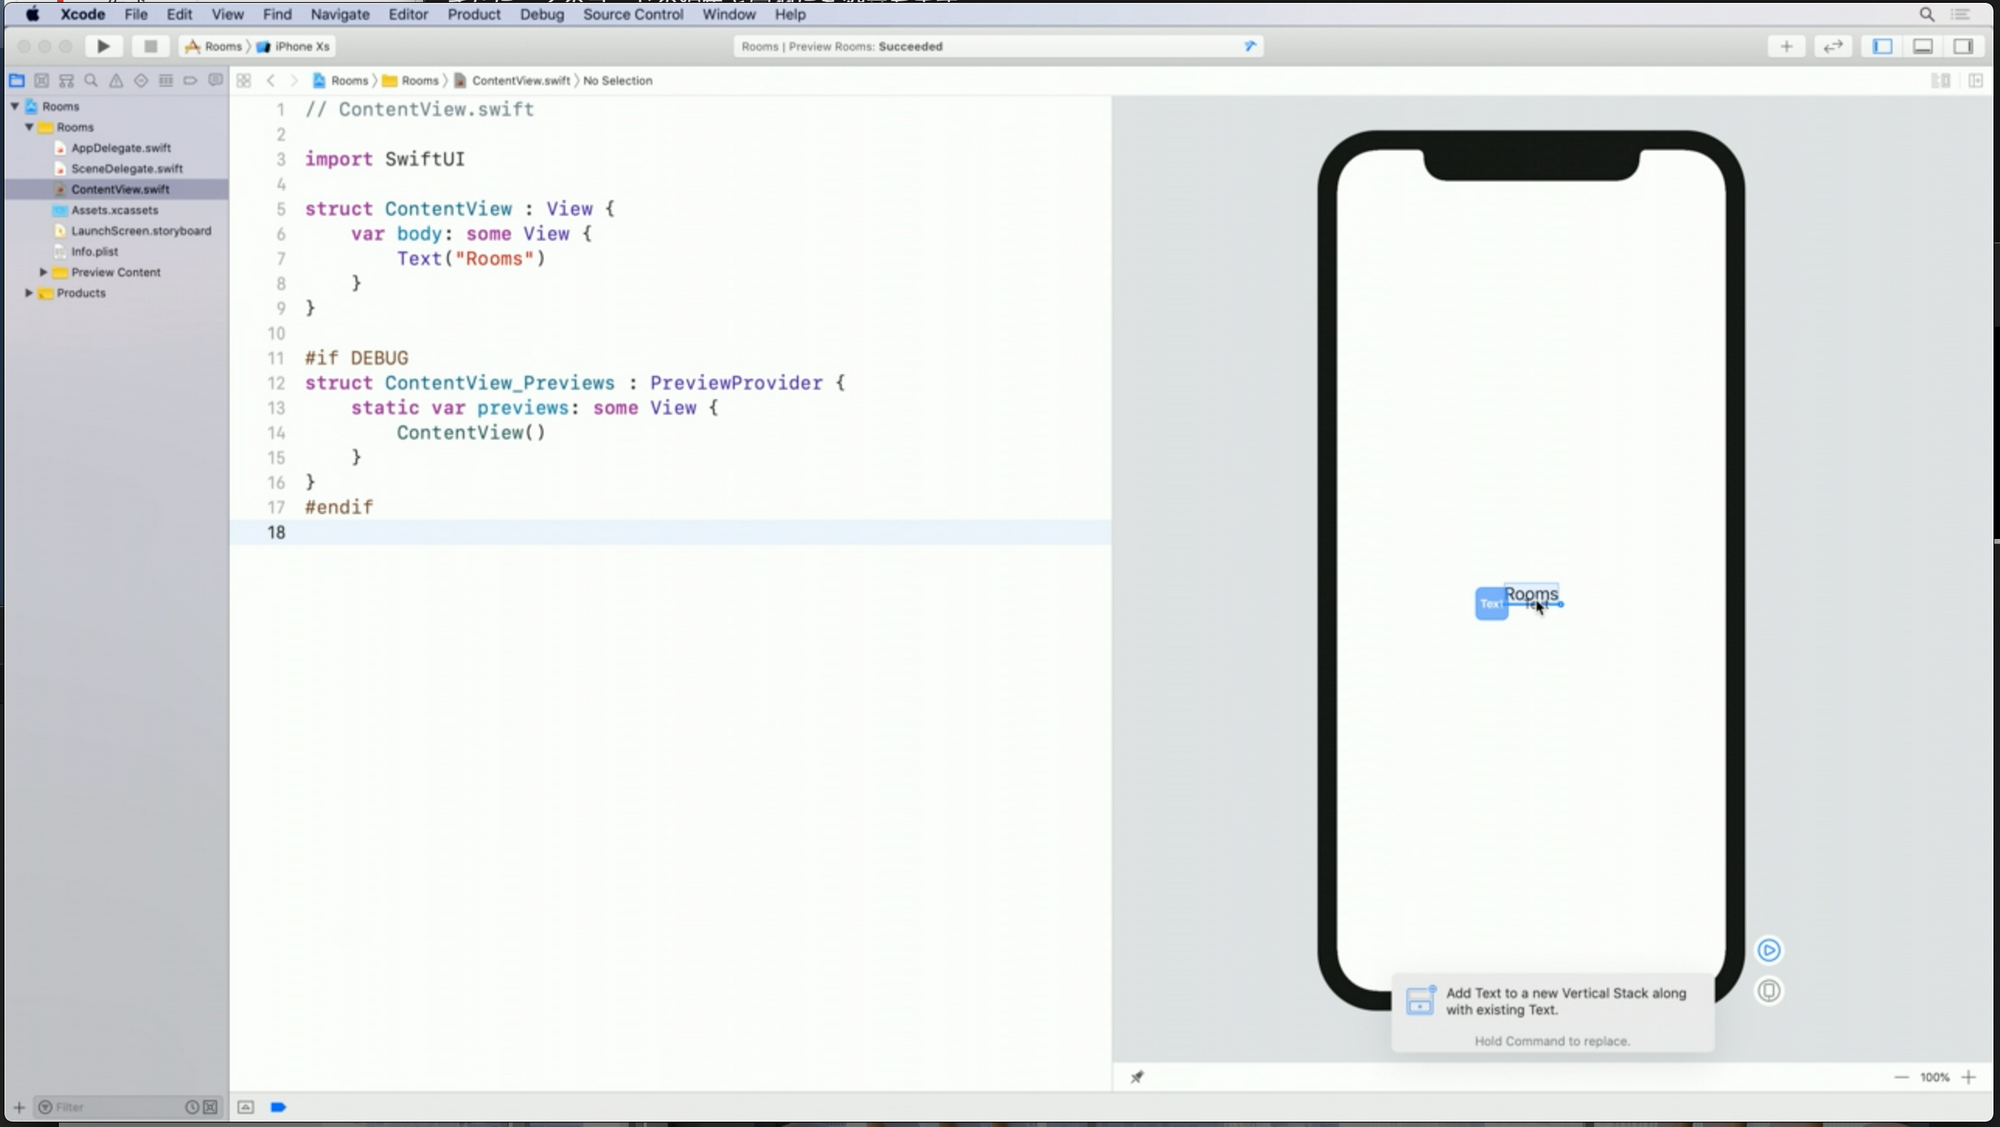
右上の「+」ボタンをクリックするとビューライブラリーインスペクタが表示されます。
Textを選んでキャンバスに置くとコードにも反映されます。
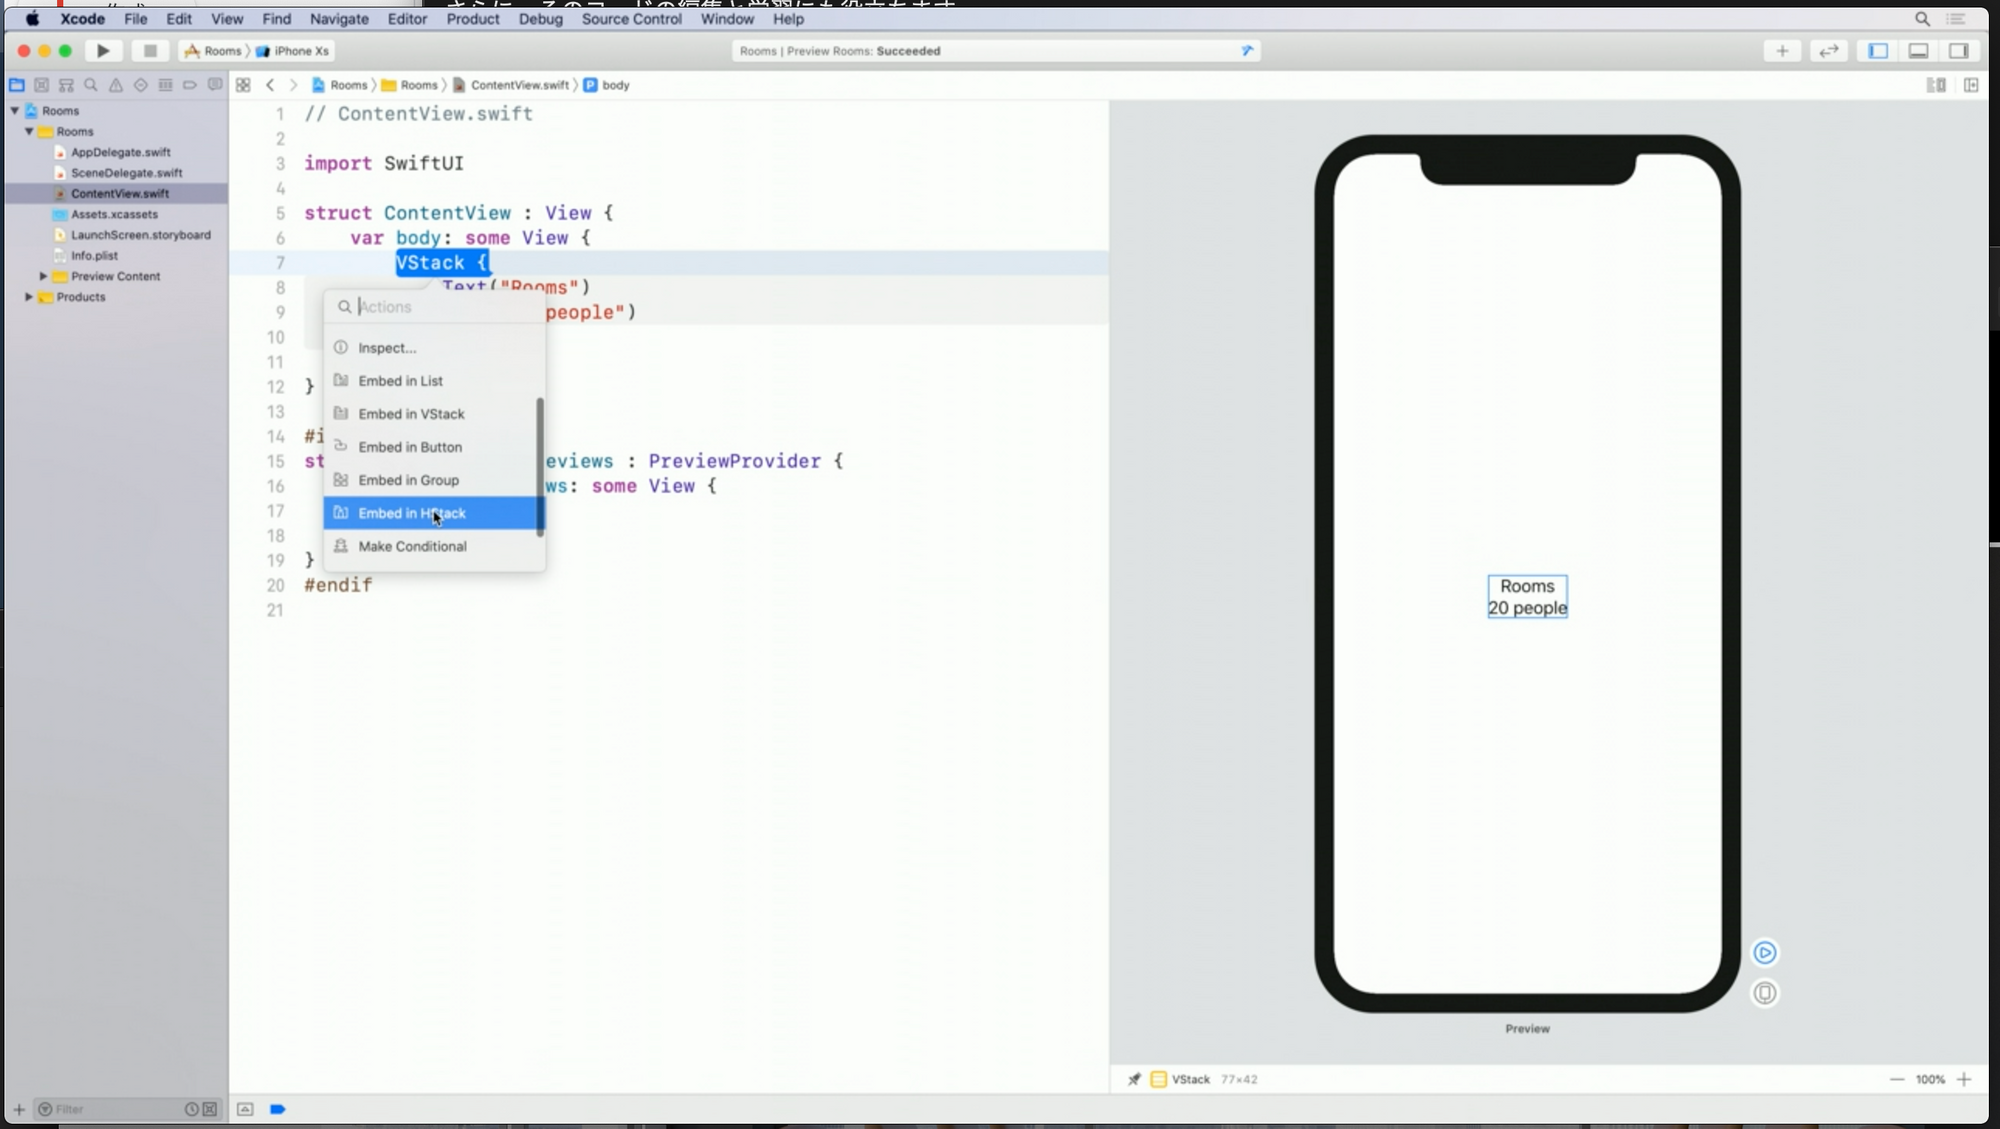
コードからビューを切り出す
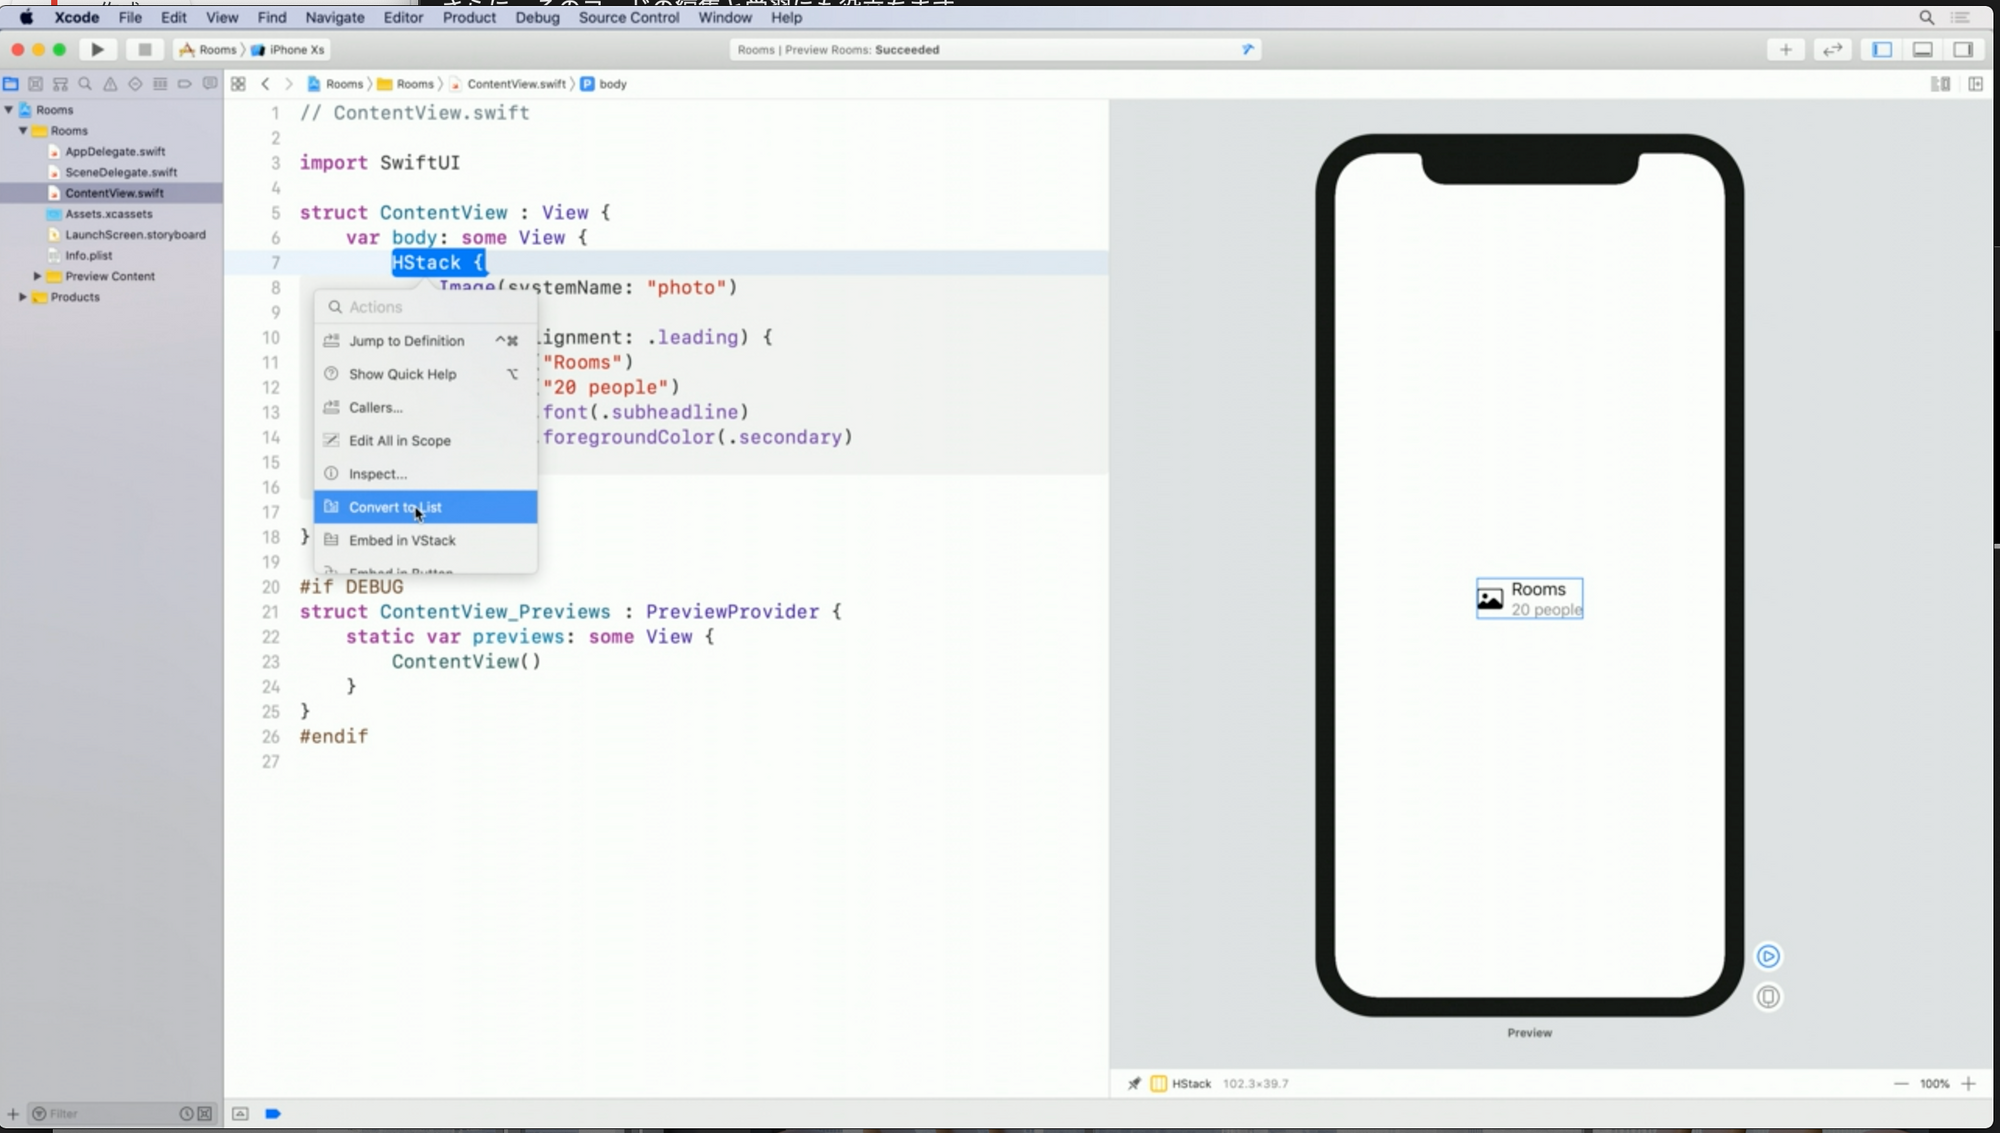
コードエディターから「VStack」を⌘+クリックするとインスペクタが表示され、HStackを選ぶと選択したVSTackを内包するHSTackが作成されます。(キャンバスにも反映される)
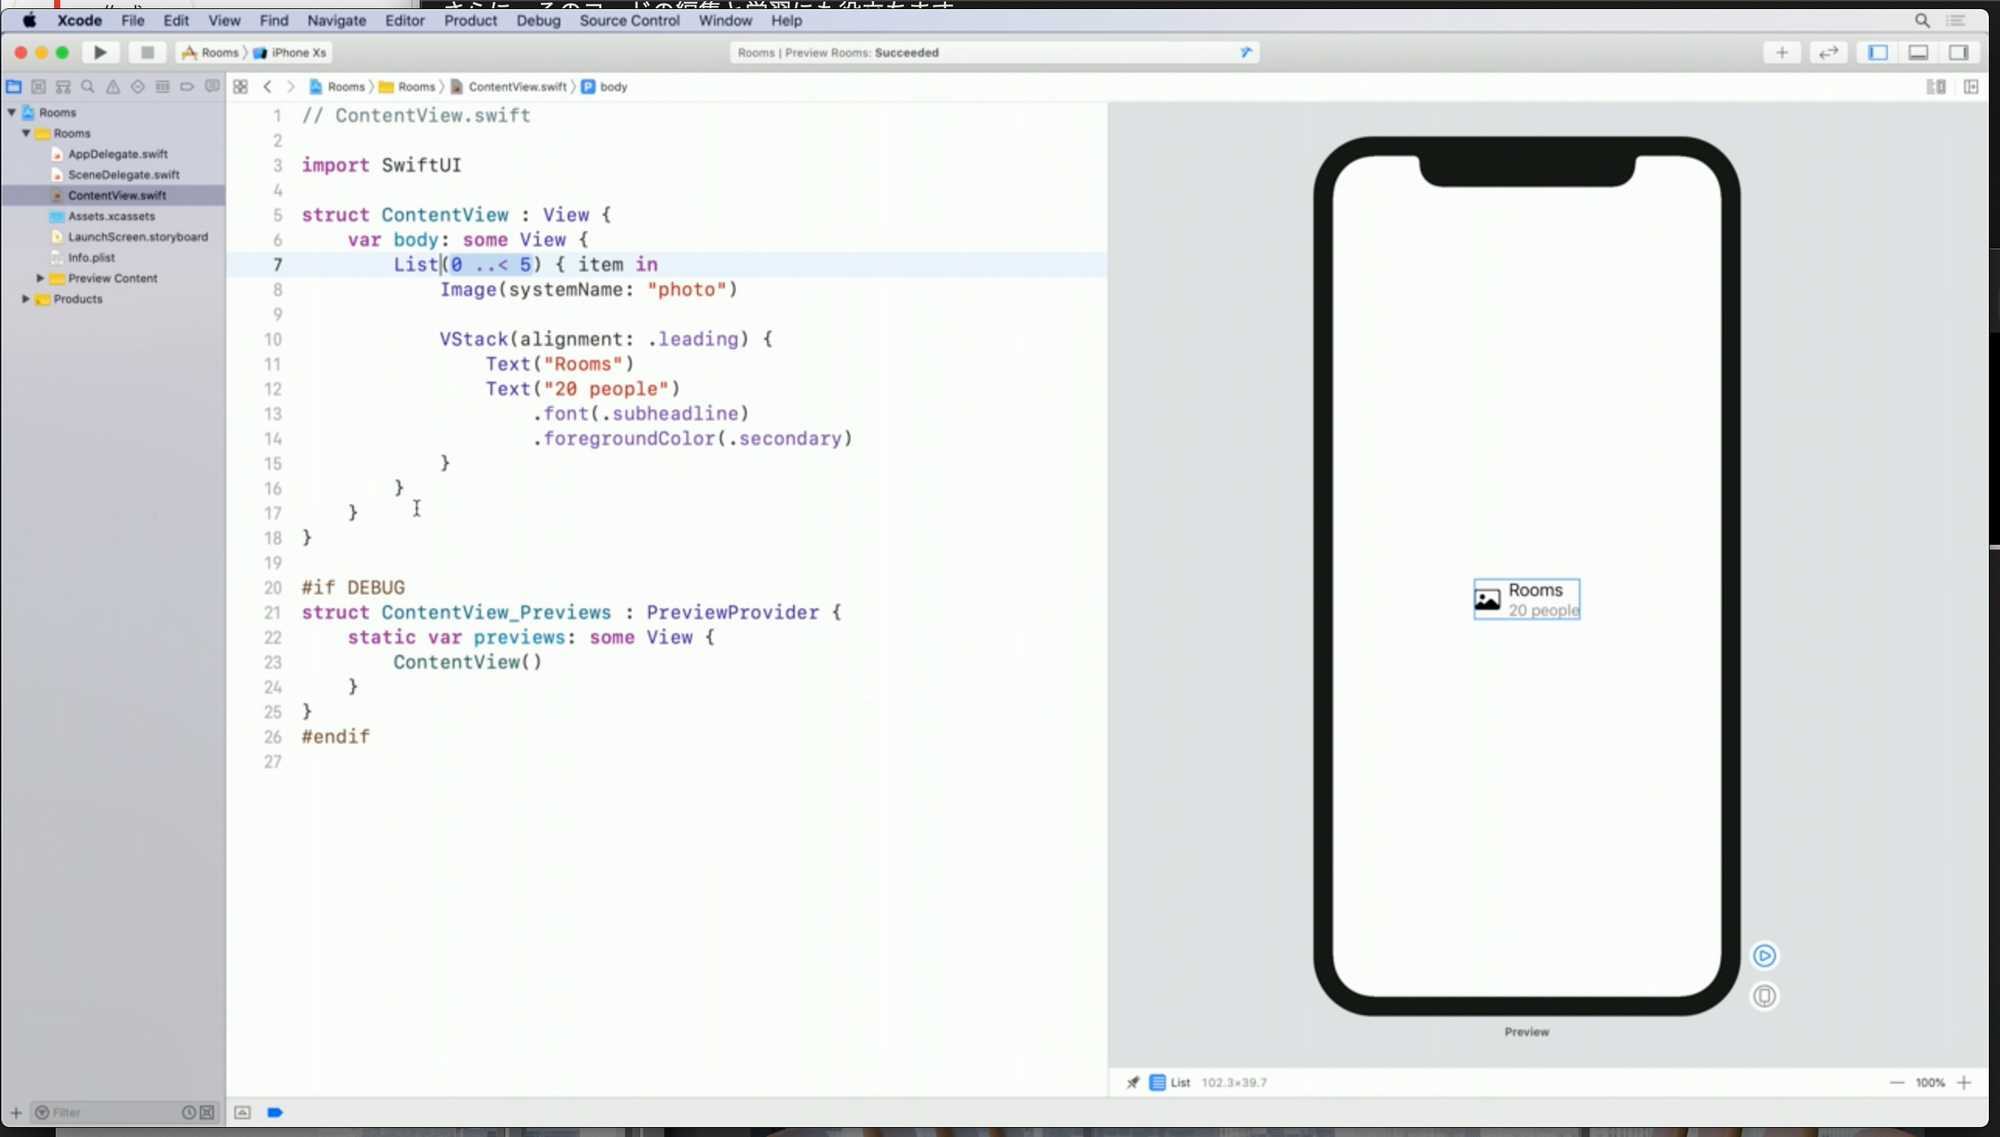
Convert to Listをすることでリストを作ることもできる。
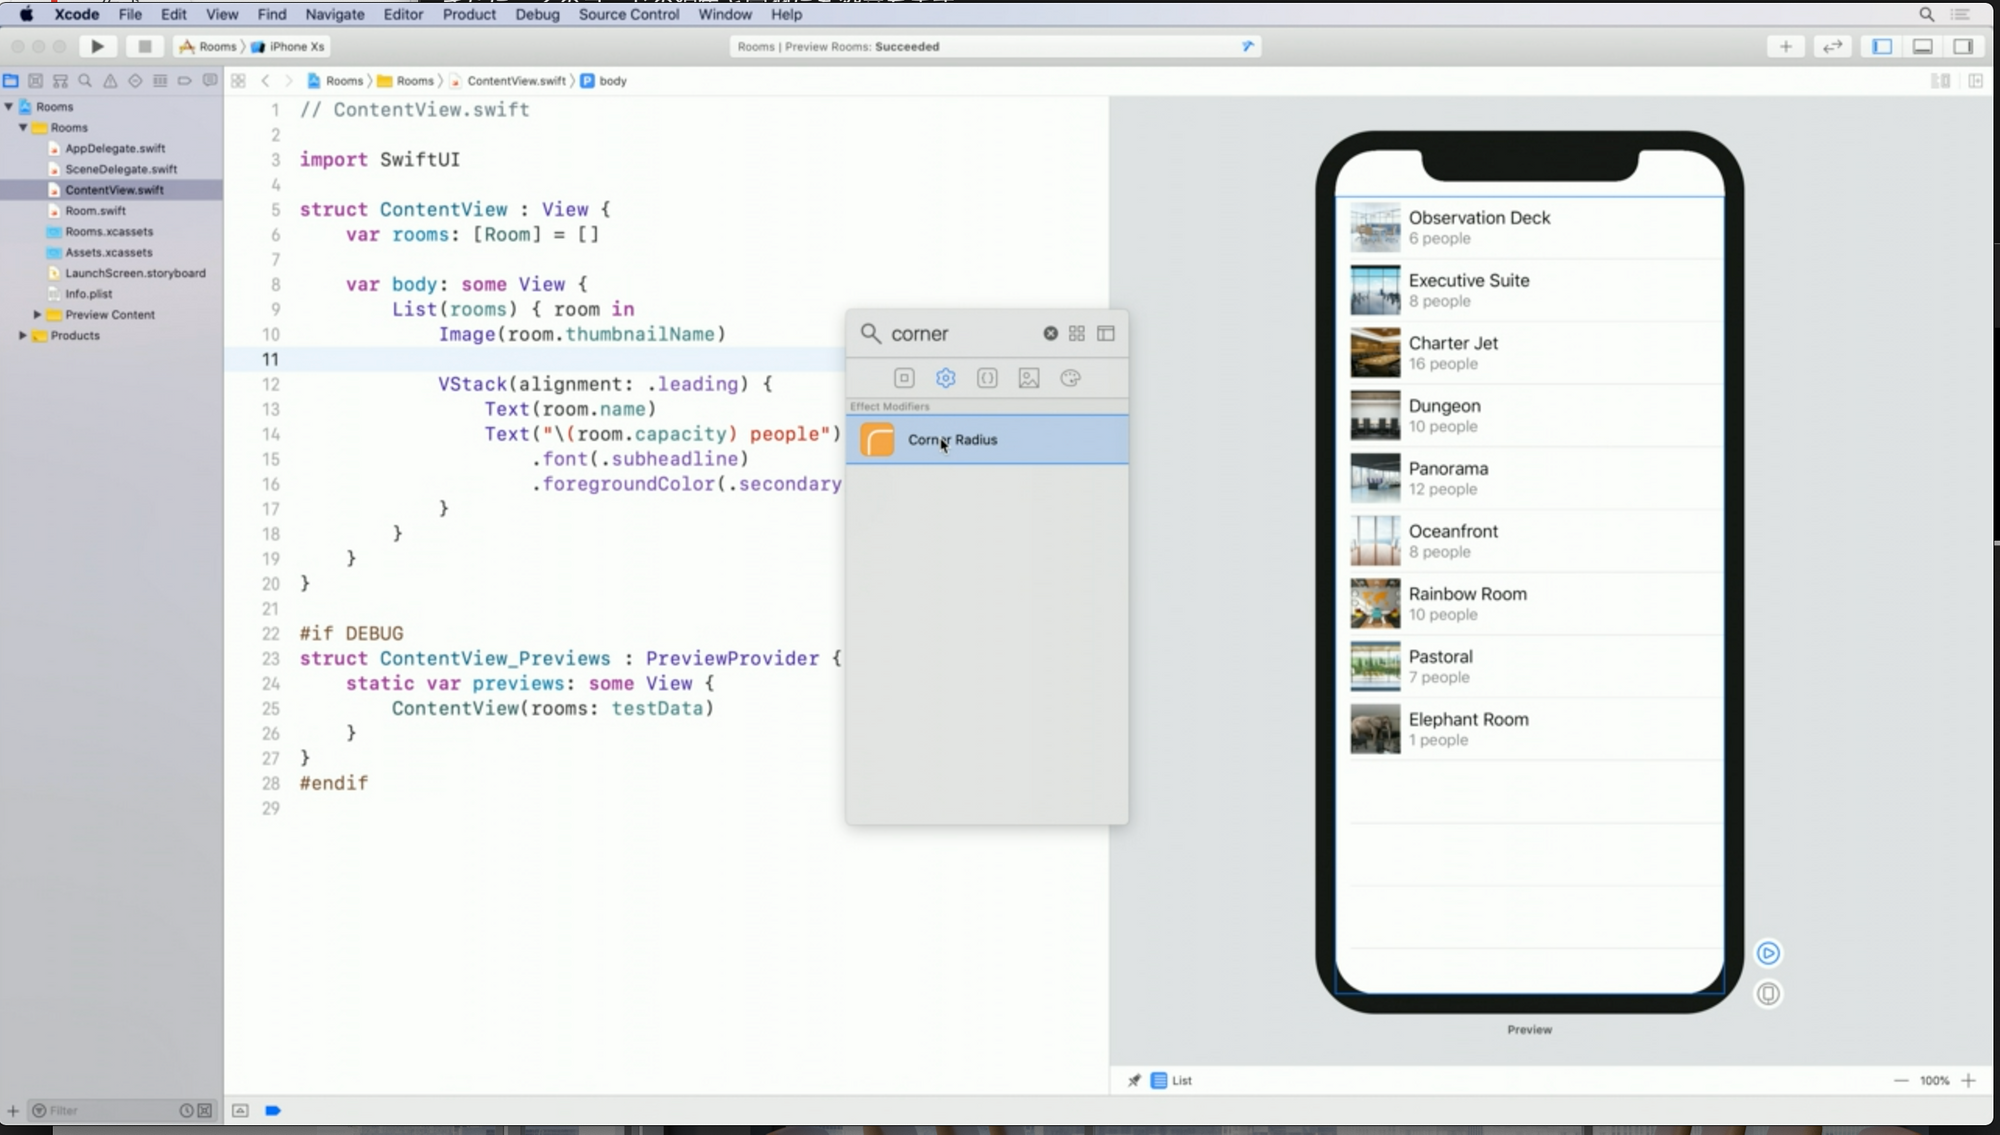
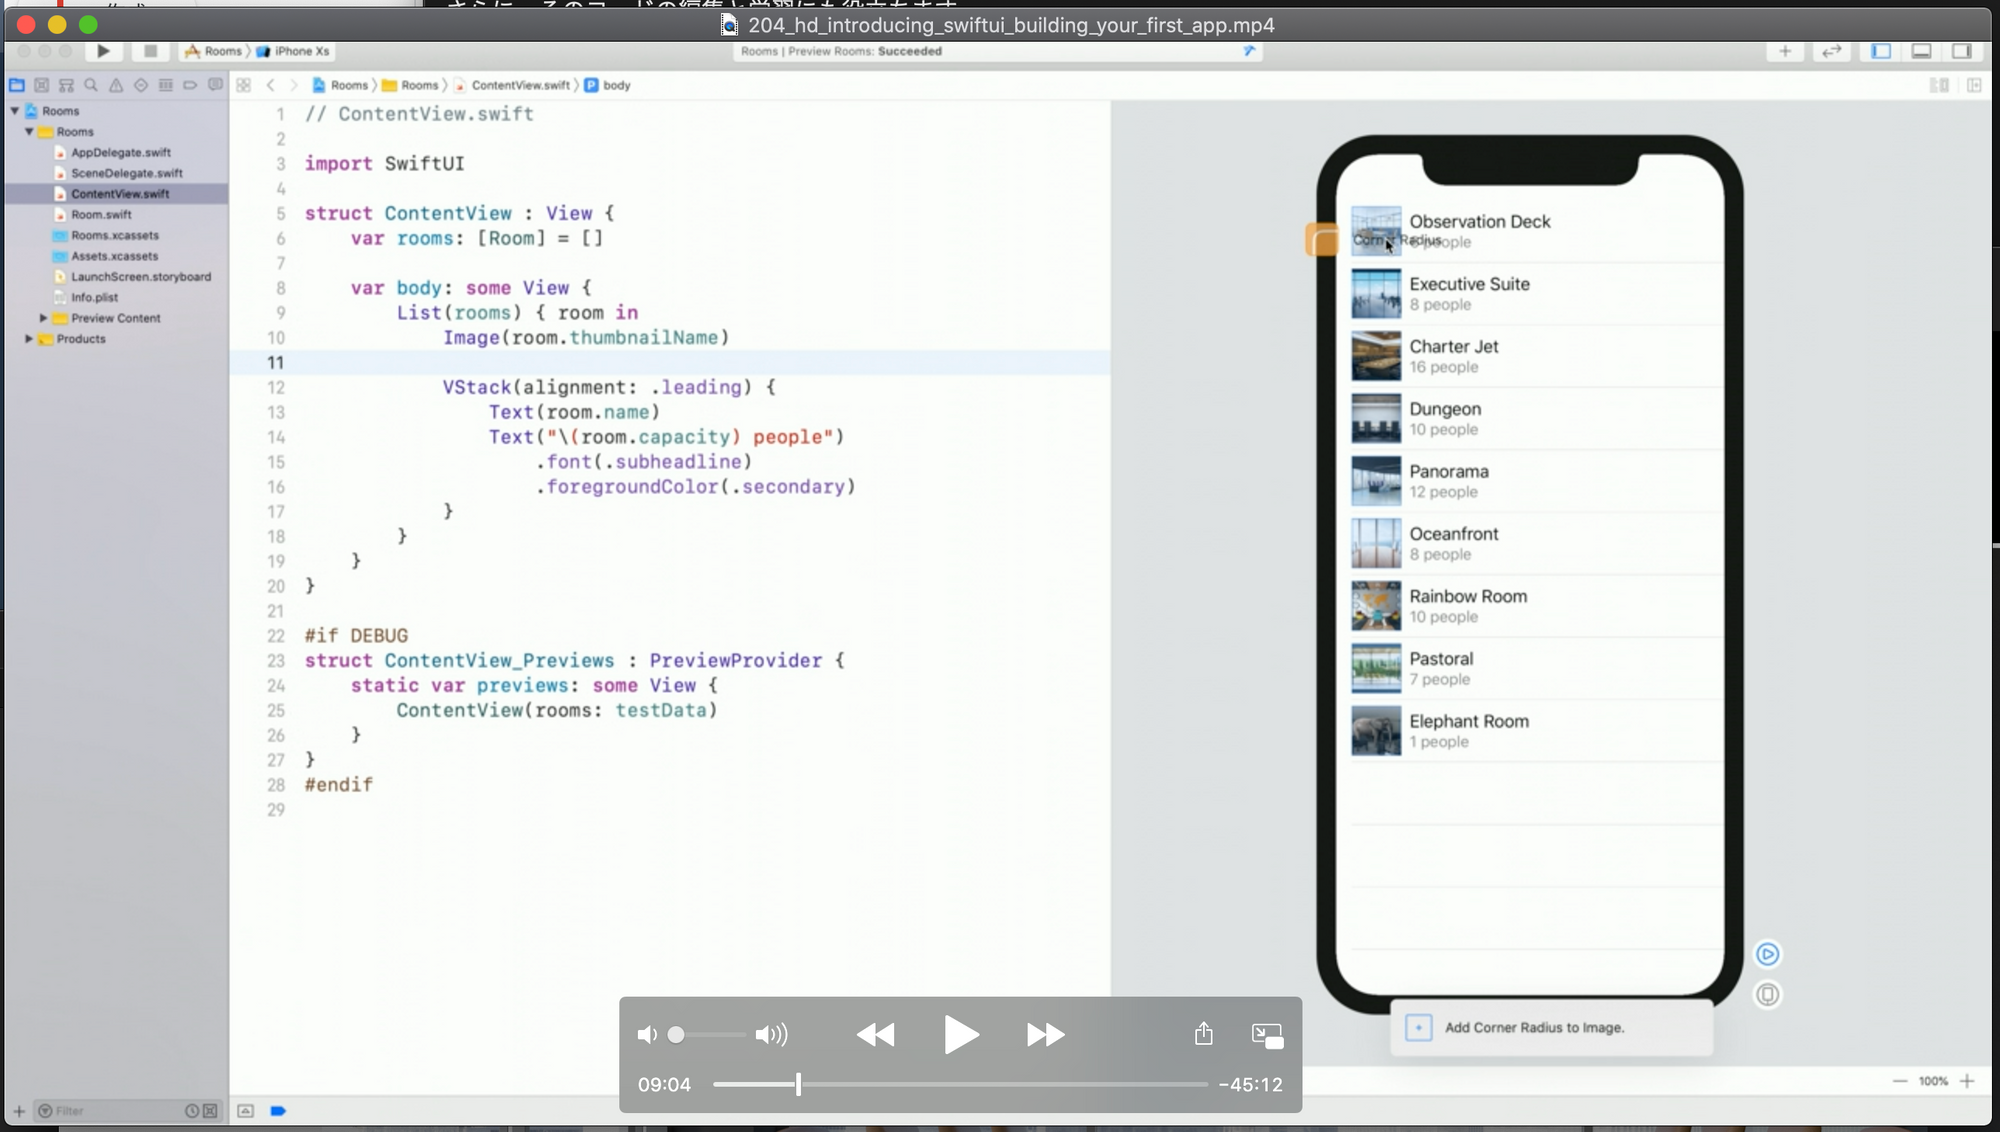
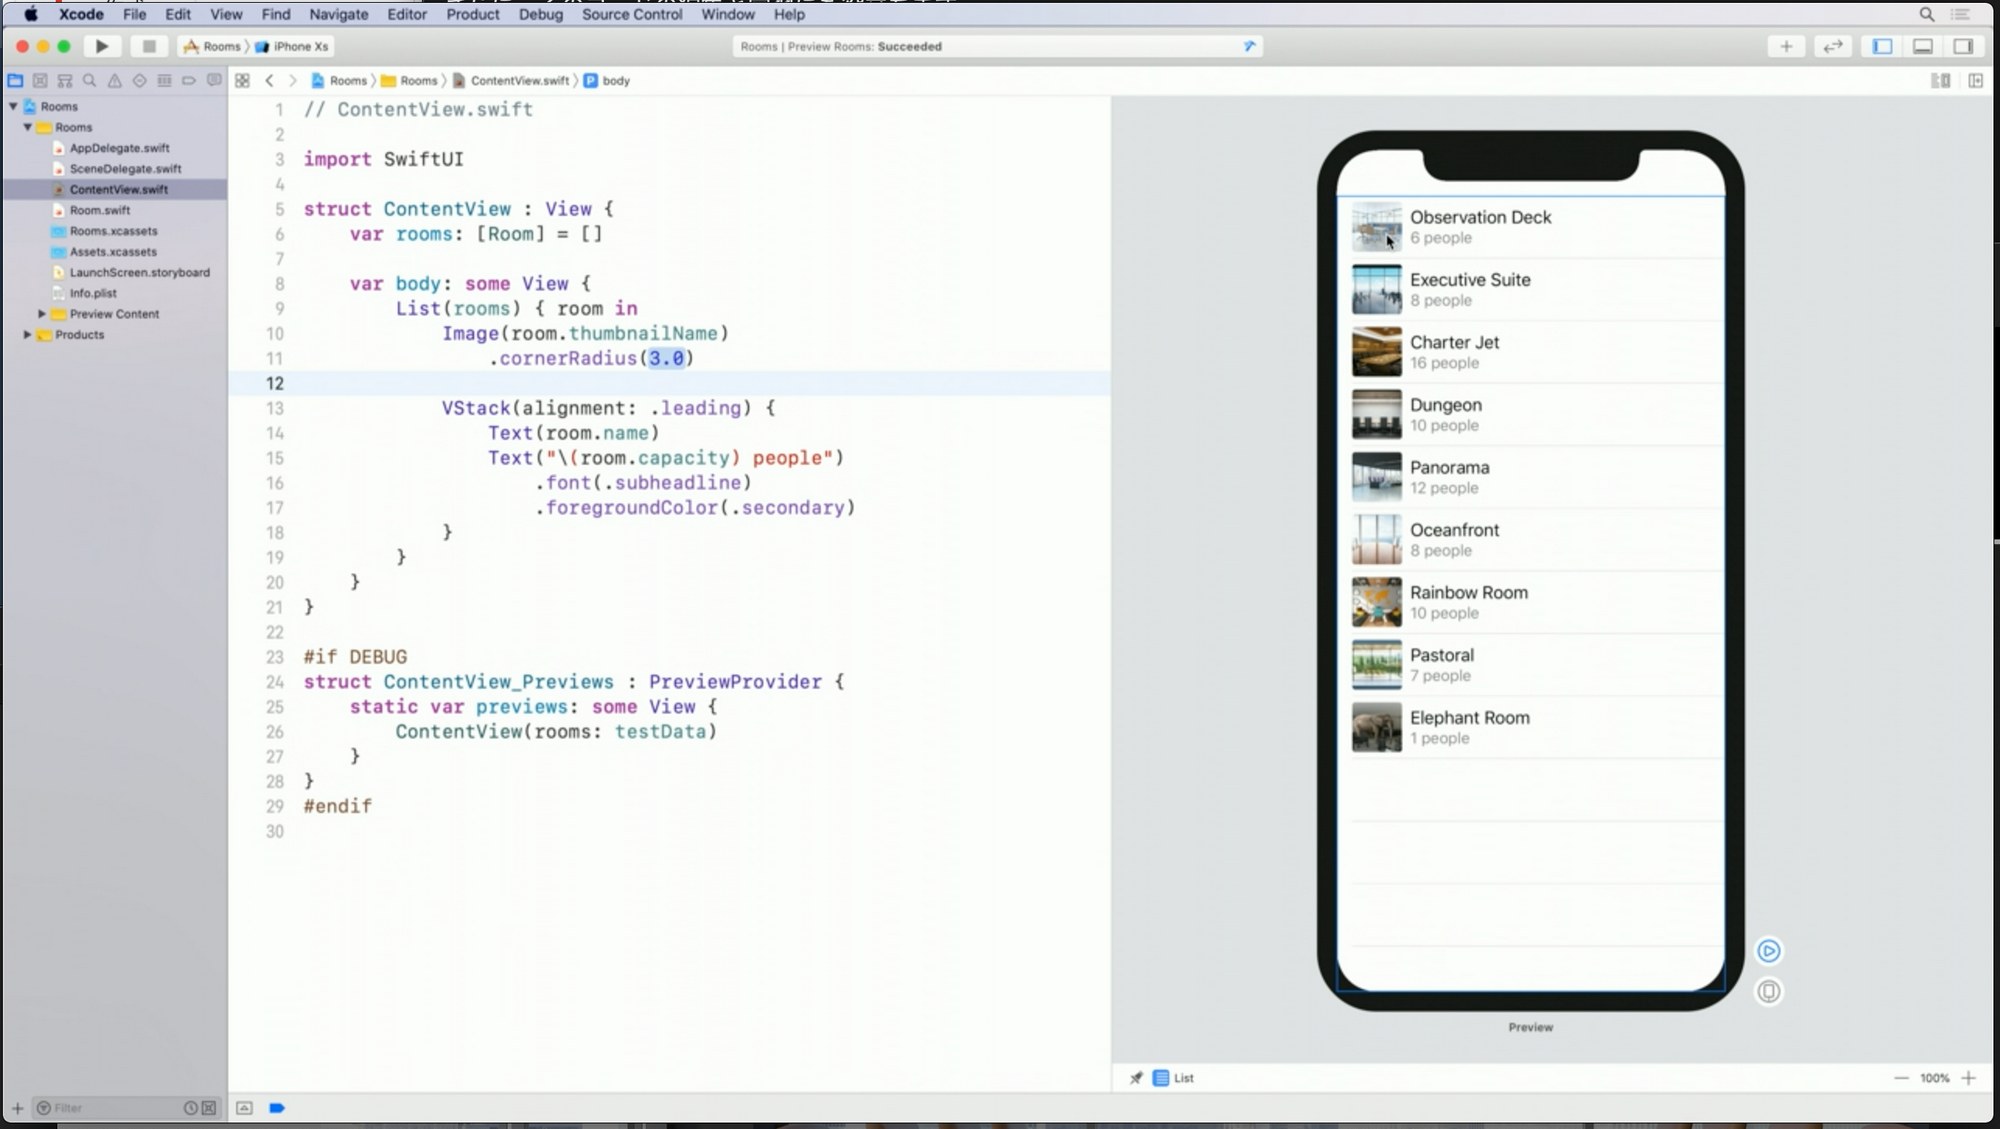
キャンバスからビューライブラリインスペクタを表示してCorner Radiusを画像に重ねると角丸を作ることができます。コードエディターにも反映されます。
ナビゲーションで画面遷移する
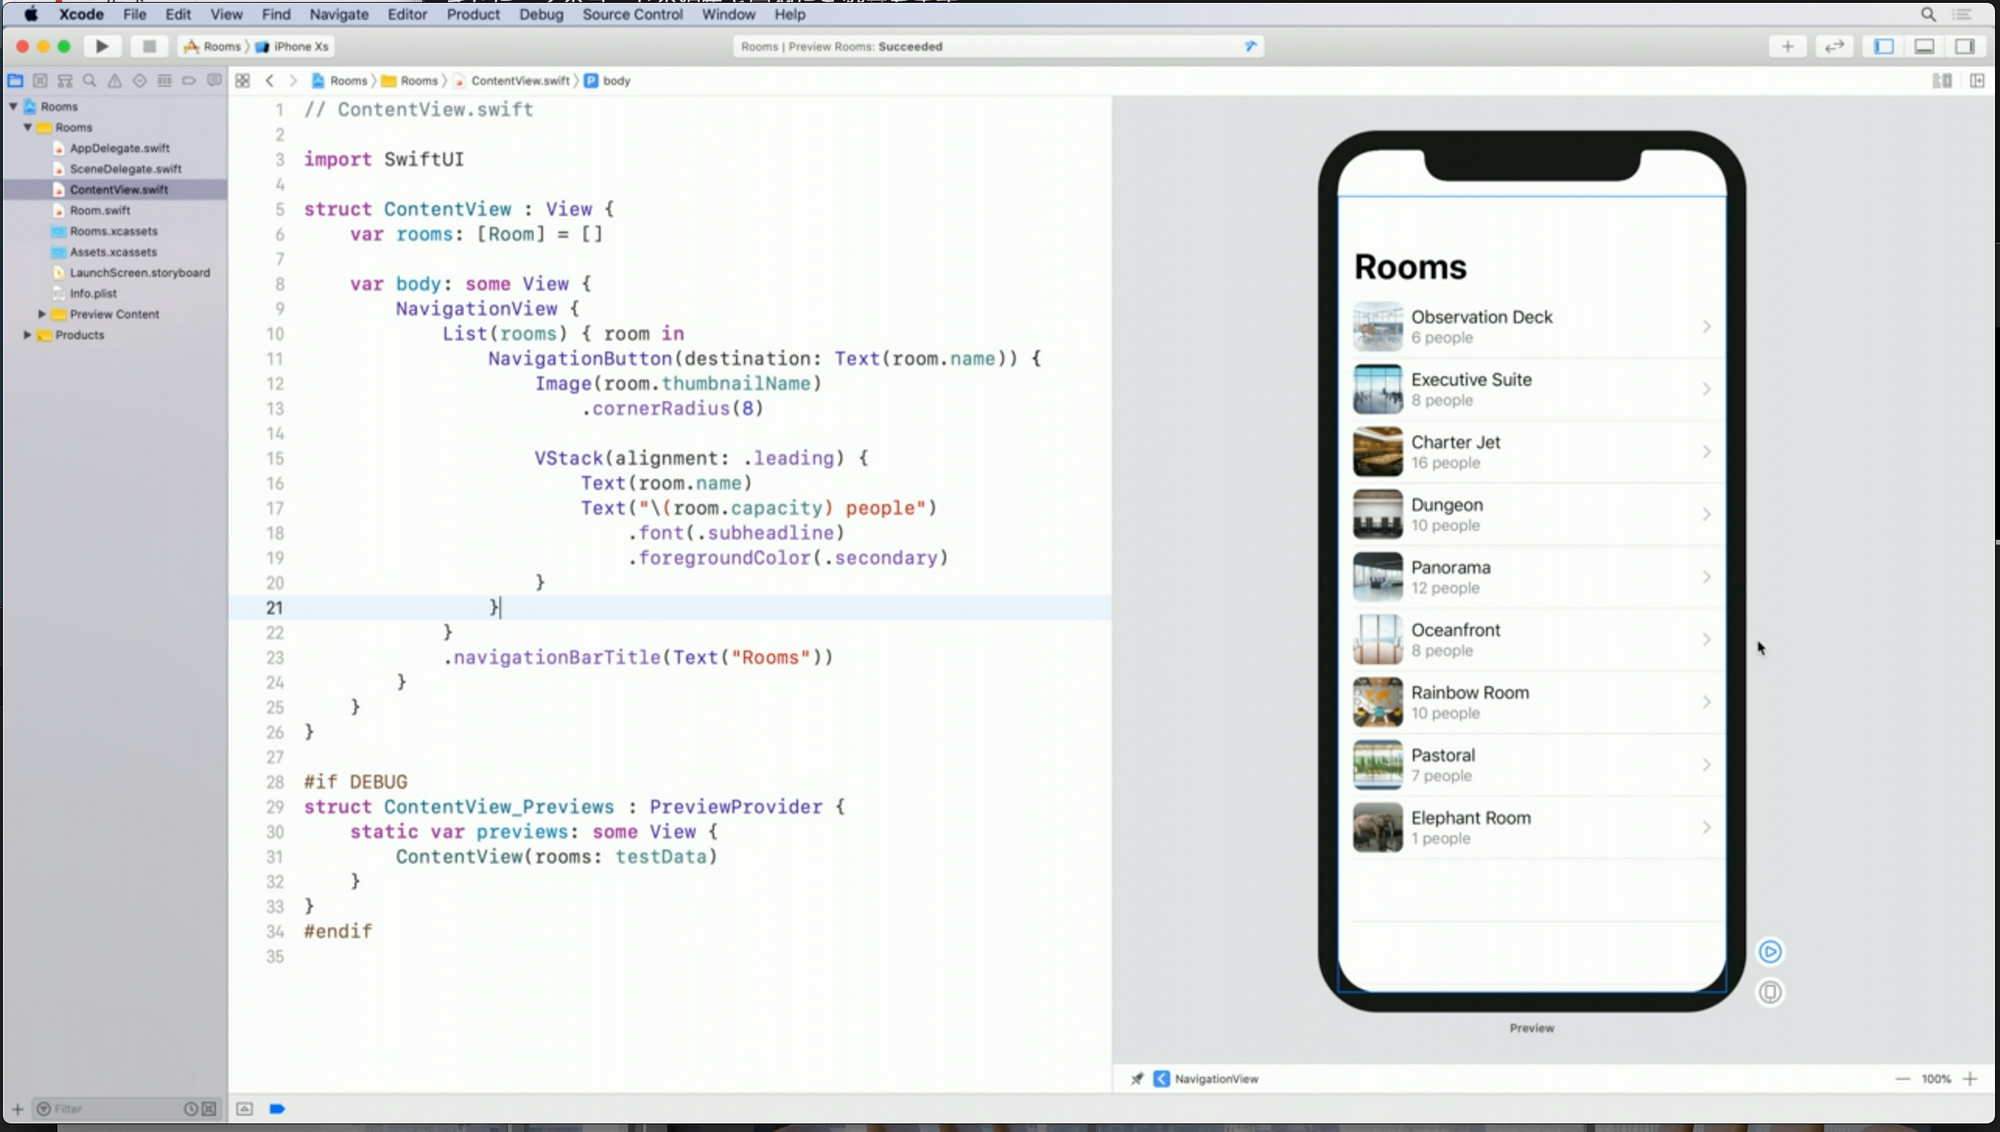
NavigationLink(destination: Text(room.name))をすることでプッシュ遷移をすることができる。(VideoのNavigationButtonは古いメソッド)
destinationパラメーターにビューを渡すことで遷移ができる。
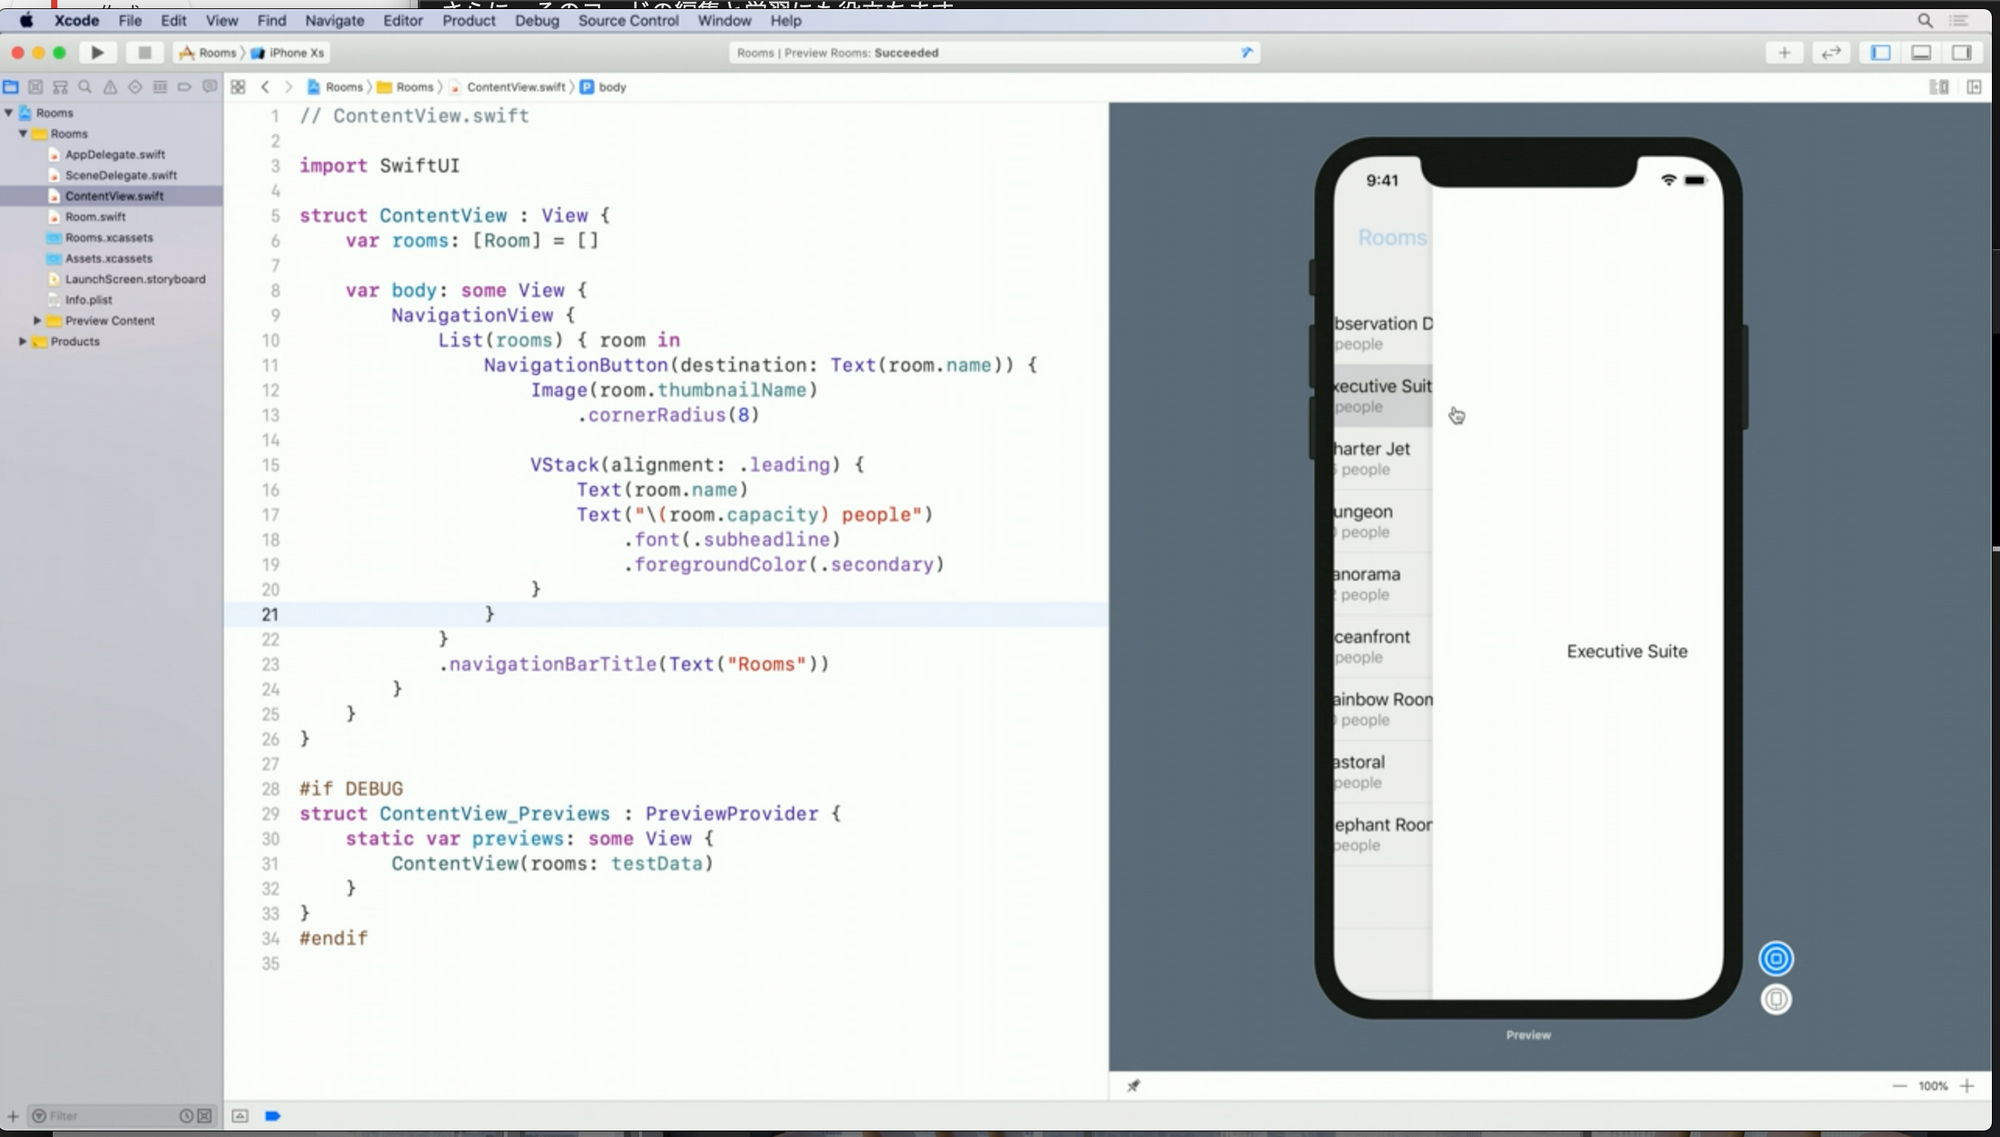
自動でスワイプバックも実現し、セルはハイライトしてくれる。
struct NavigationRoomView: View {
    var rooms: [Room] = []
    var body: some View {
        NavigationView {
            List(rooms) { room in
                NavigationLink(destination: Text(room.name)) {

                    Image(systemName: "photo")
                        .cornerRadius(0)

                    VStack(alignment: .leading) {
                        Text(room.name)
                        Text("\(room.capacity) people")
                            .font(.subheadline)
                            .foregroundColor(.secondary)
                    }
                }
            }
            .navigationBarTitle("Rooms")
        }
    }
}
Extract SubView
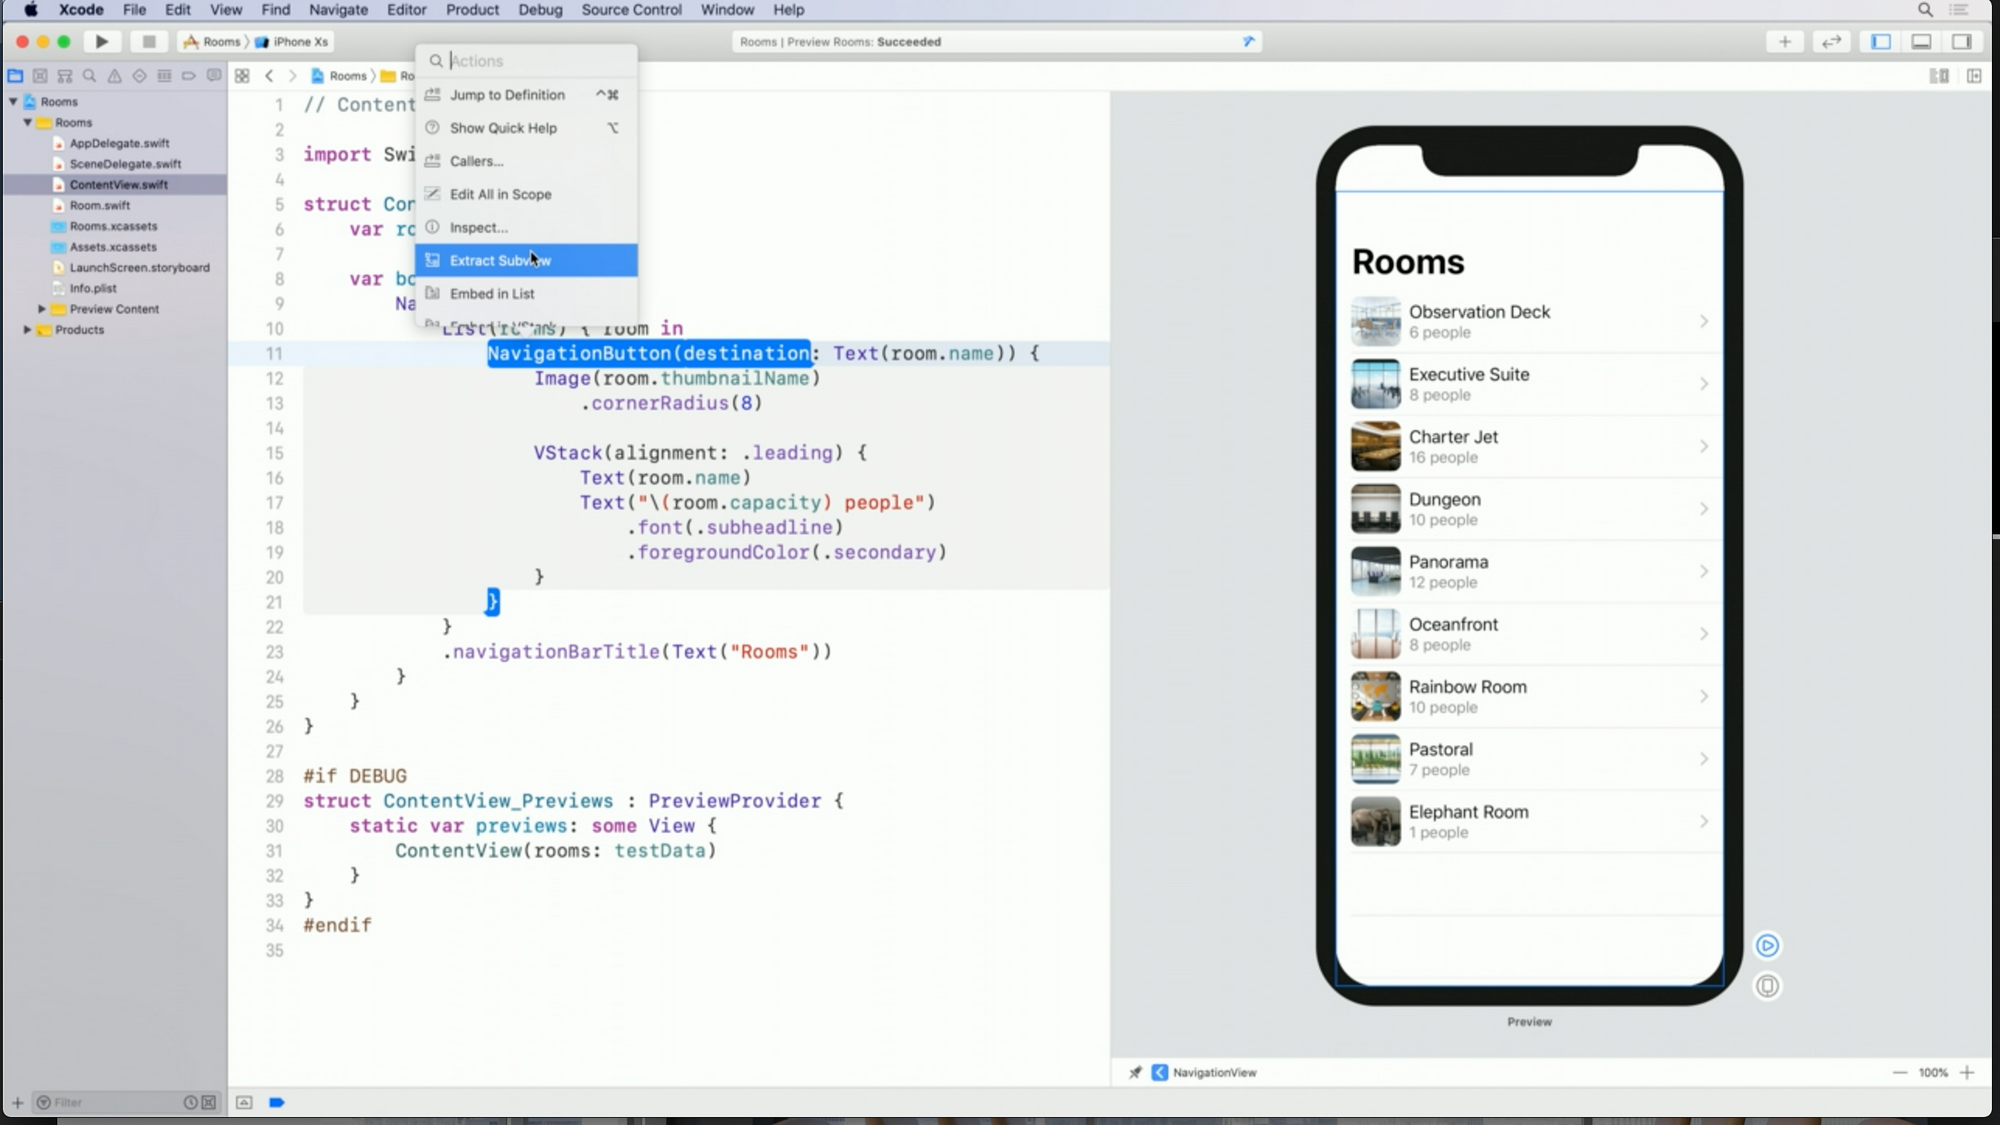
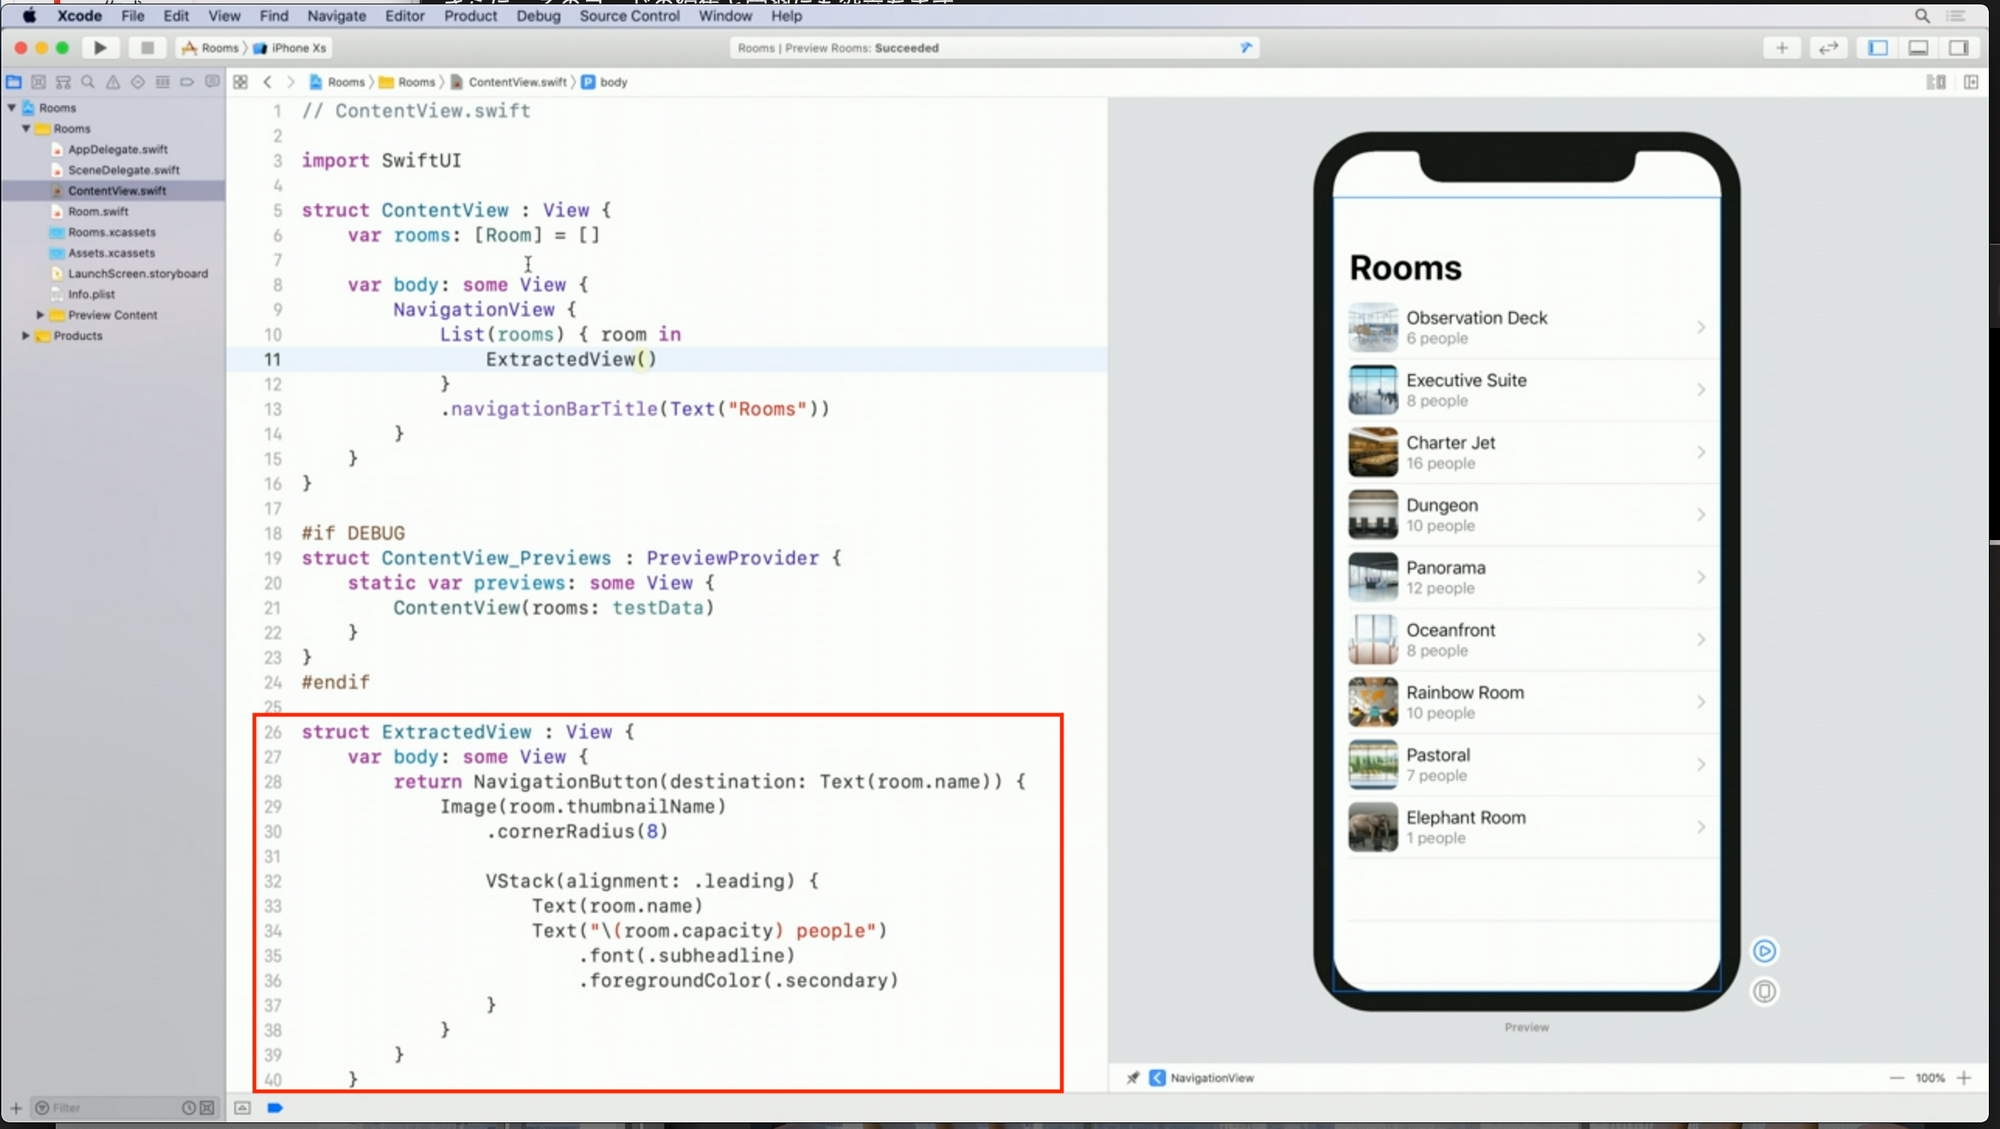
ビューのネストが深くなったら切り分けることができる。
切り分けたいビューにカーソル重ねて⌘+クリックでインスペクタを表示して、Extract Subviewを選択するとそのビューをまるまる新しいStructとして切り出してくれる。
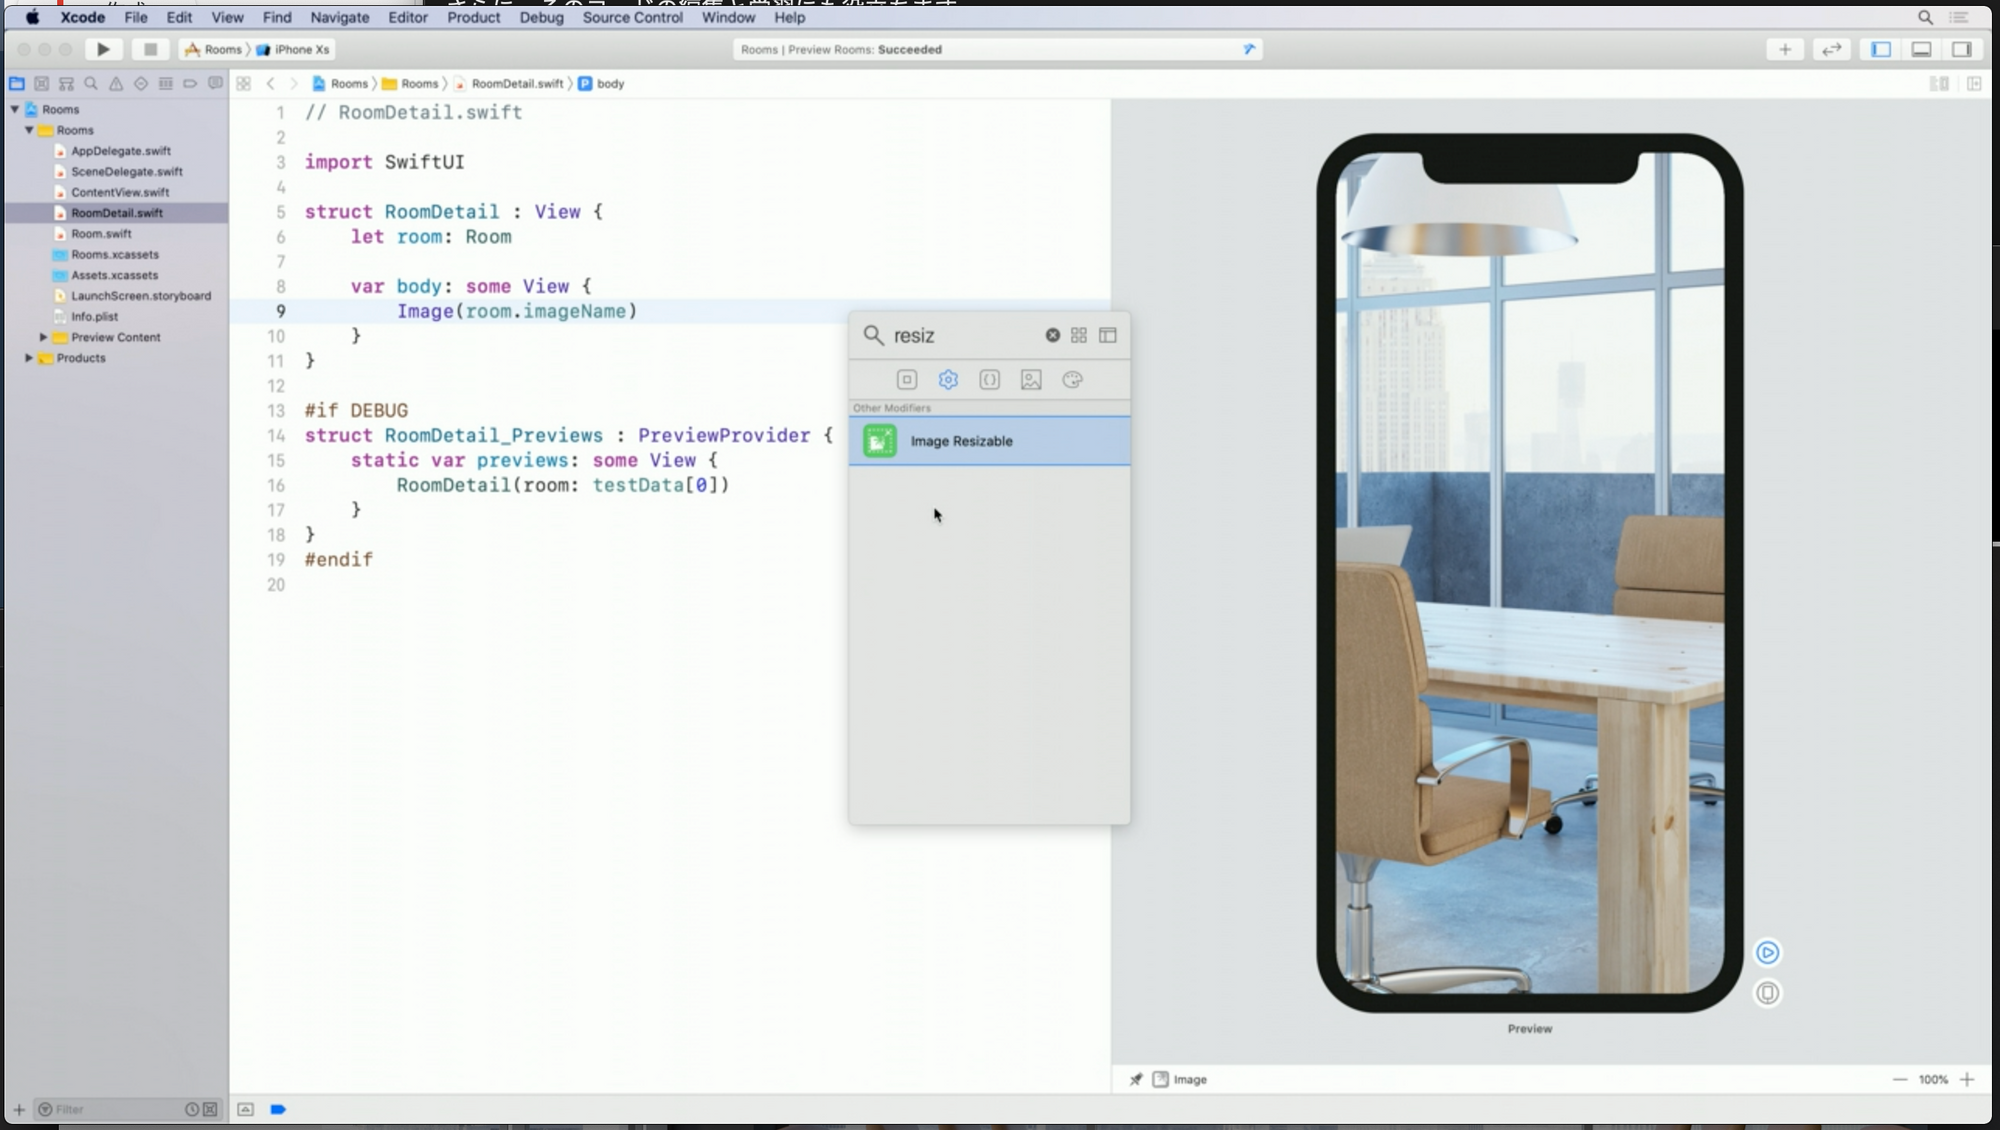
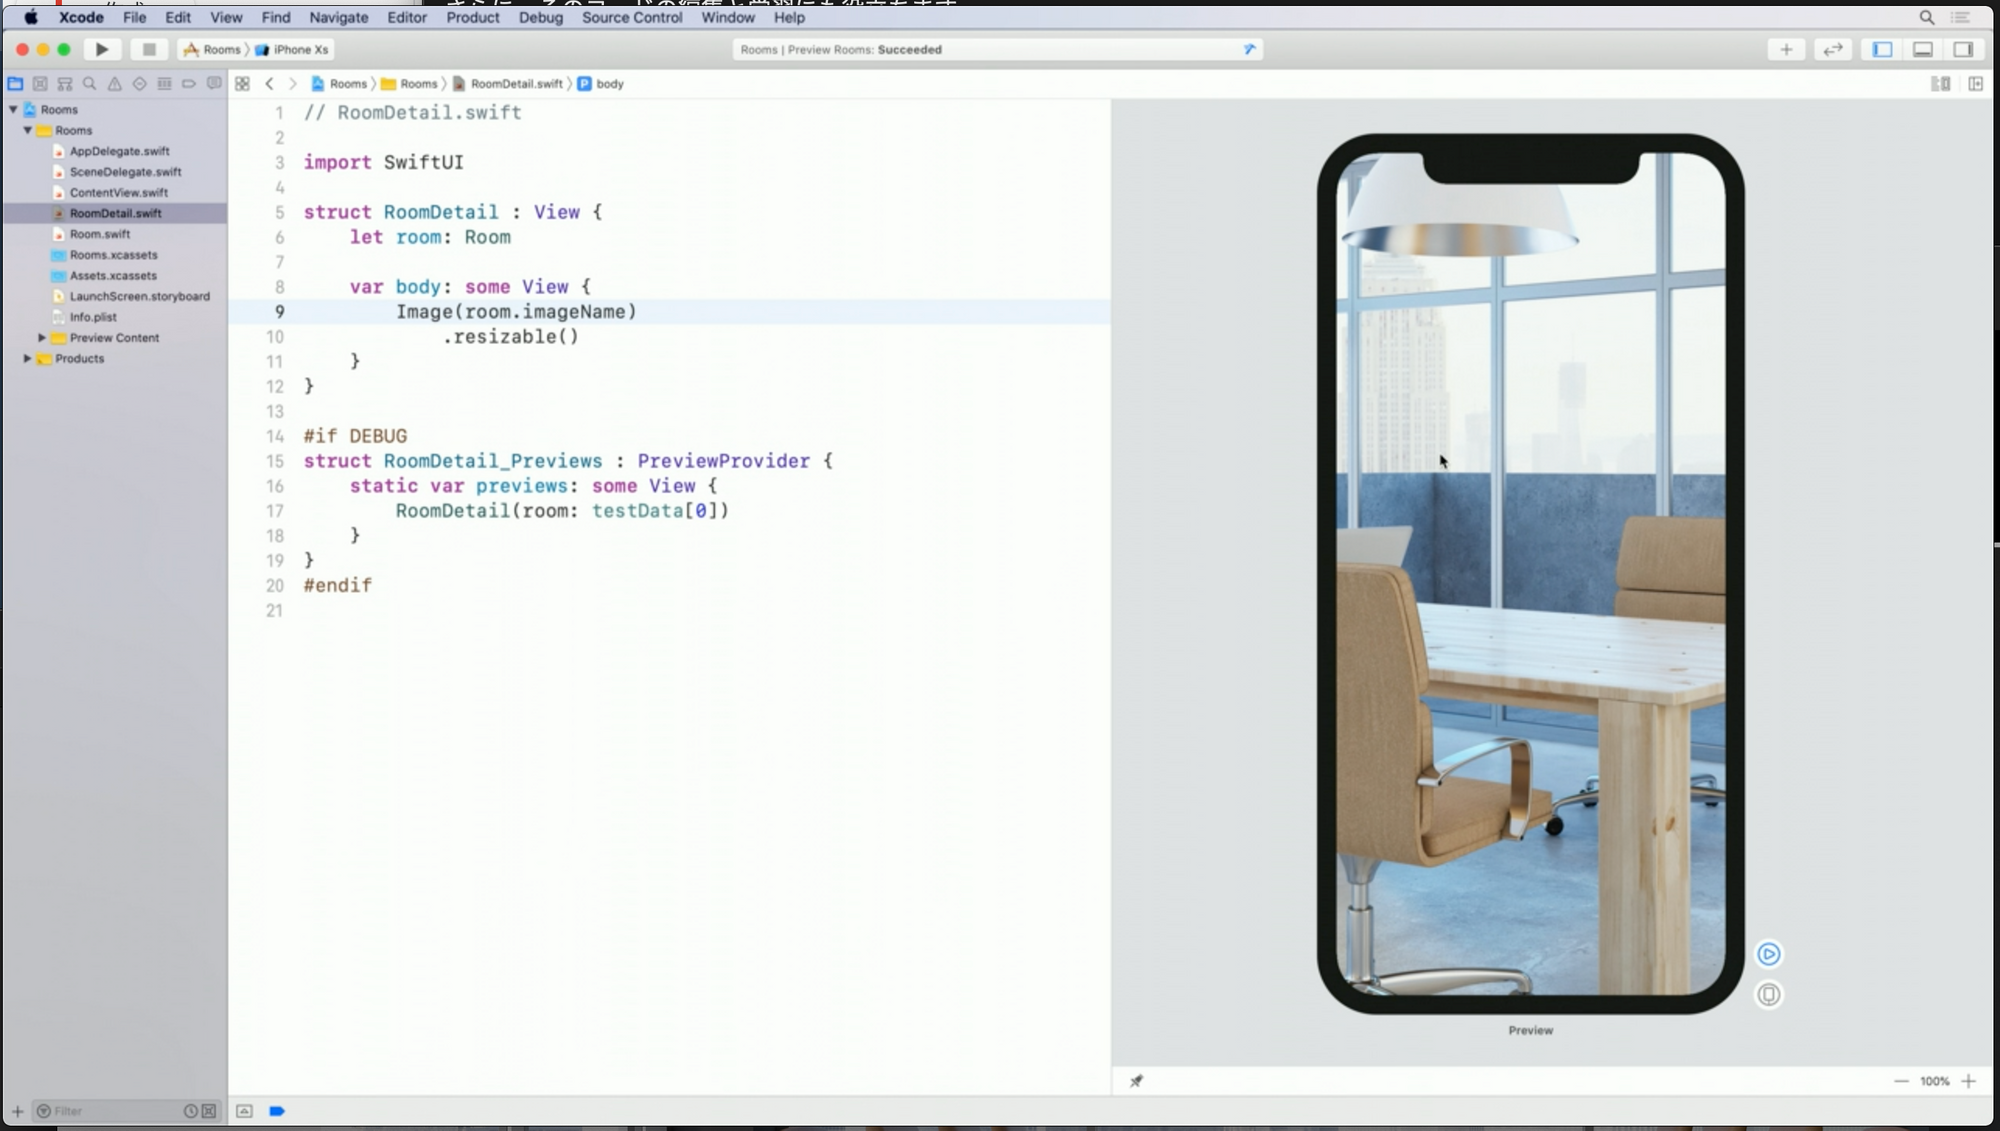
Imageのresizable
Imageに画像を渡すとデフォルトでは画像サイズそのまま表示されます。
resizableメソッドでルートビューのサイズにリサイズができます。
画像タップでズーム切り替え(左上にカメラアイコン)
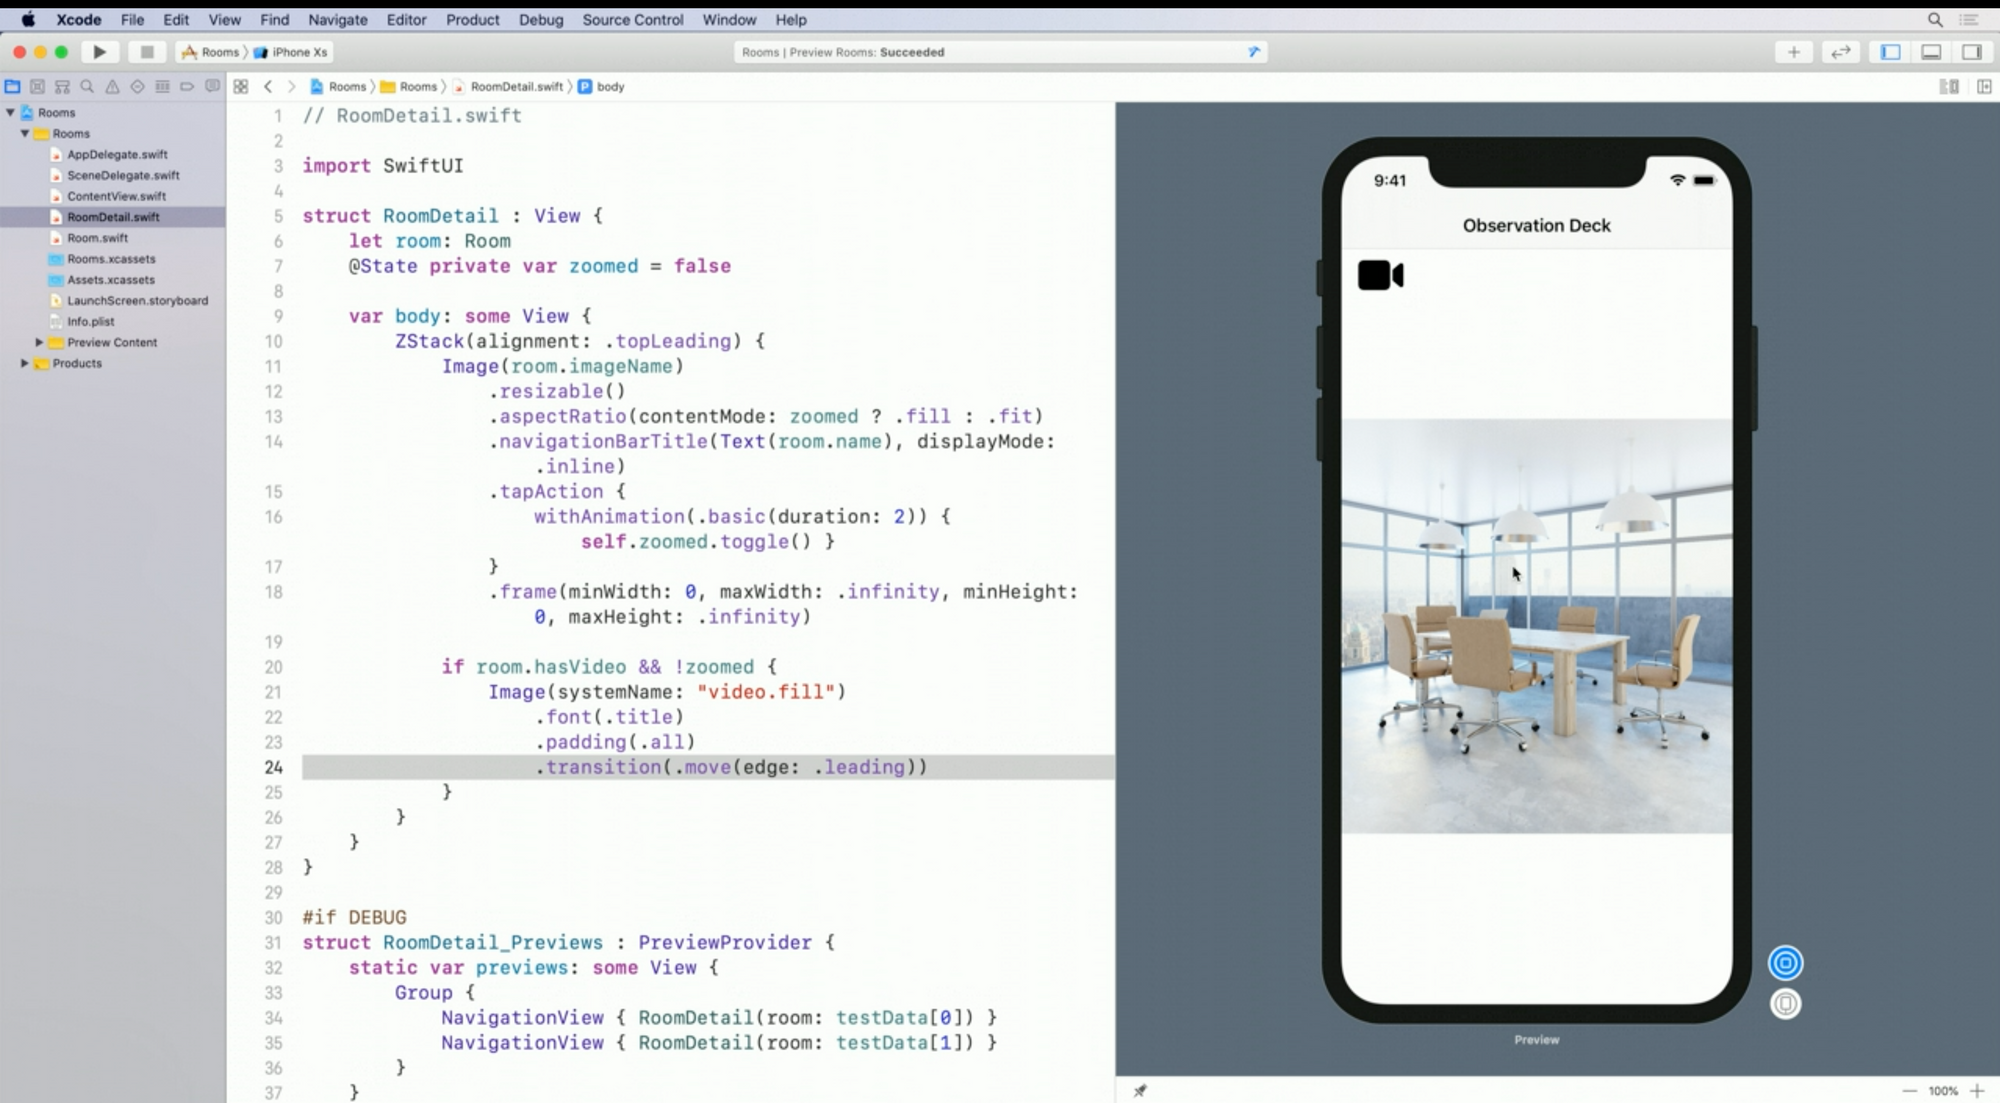
画像タップでズーム、左上のカメラアイコンを画像ズーム時には画面外に移動させるコードはこんな感じ。
struct DetailView: View {
    @State private var zoomed = false

    var body: some View {

        ZStack(alignment: .topLeading){
            Image("snap")
                .resizable()
                .aspectRatio(contentMode: zoomed ? .fill : .fit)
                .navigationBarTitle(Text("Detail"), displayMode: .inline)
                .onTapGesture {
                    withAnimation(.linear(duration: 2)) {
                        self.zoomed.toggle()
                    }
            }

            if !zoomed {
                Image(systemName: "video.fill")
                    .font(.title)
                    .padding(.all)
                    .transition(.move(edge: .leading))
            }
        }
    }
}
Imageに対して.onTapGestureをつけてタップイベントをつける。
withAnimationでアニメーションをしつつzoomedプロパティを切り替える。
if !zoomed {
    Image(systemName: "video.fill")
        .font(.title)
        .padding(.all)
        .transition(.move(edge: .leading))
}
zoomedフラグがfalseだったらImage(systemName: "video.fill")でビデオアイコンを表示する。
.transition(.move(edge: .leading)) をビュー修飾子としてつけることで外に移動する動きになる。
依存関係の管理は難しい
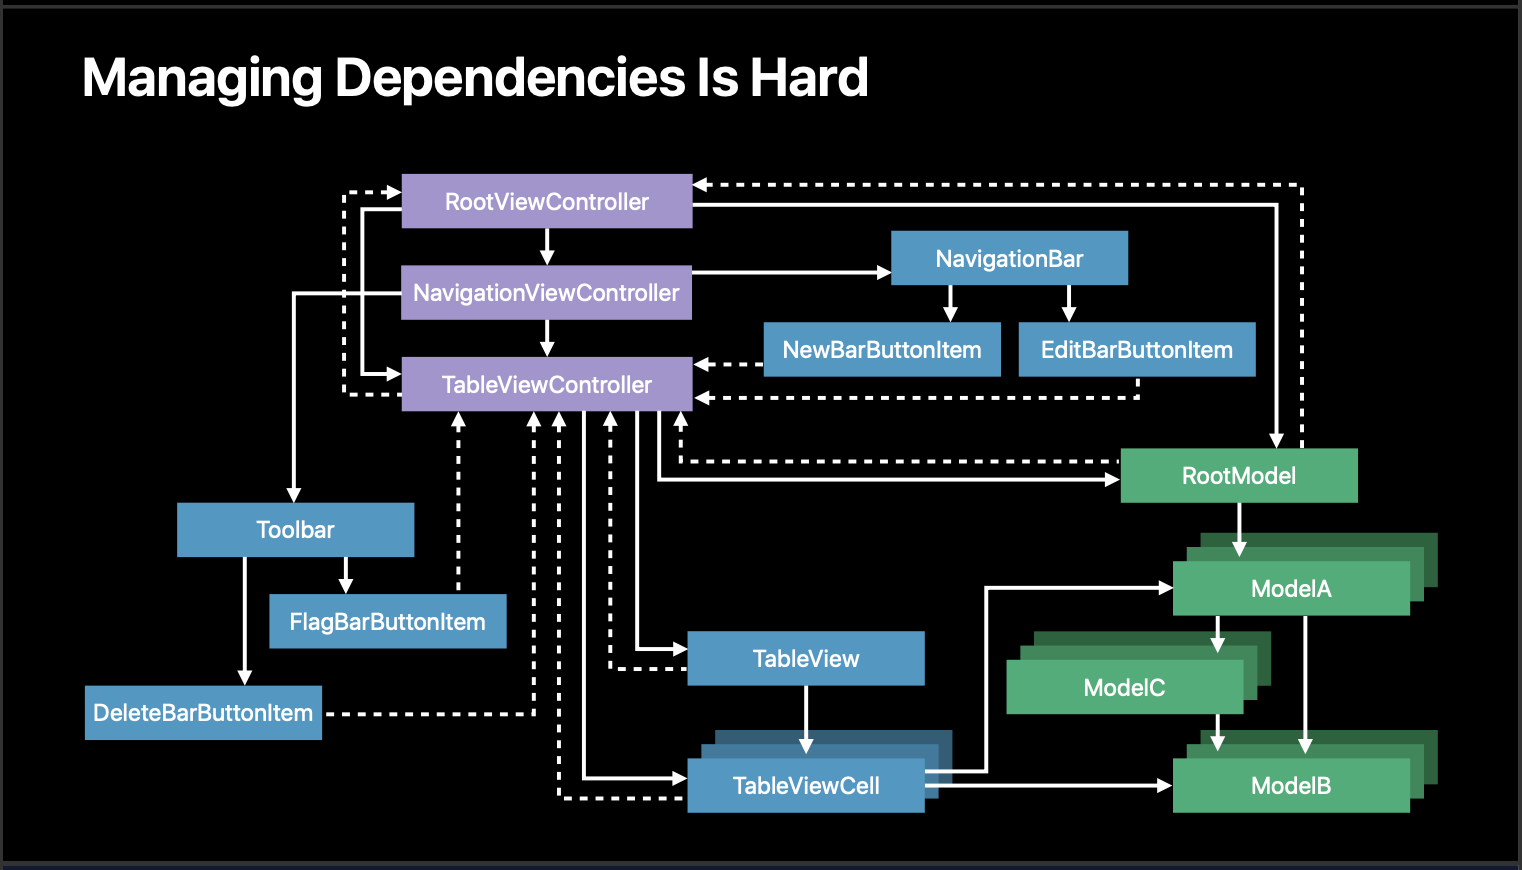
UIKit/AppKitでビューをデータの矛盾なく表示するのは難しい作業だった。
上記の図のようにView ControllerとViewとModelの依存関係は複雑で解決するのは難易度の高い作業。

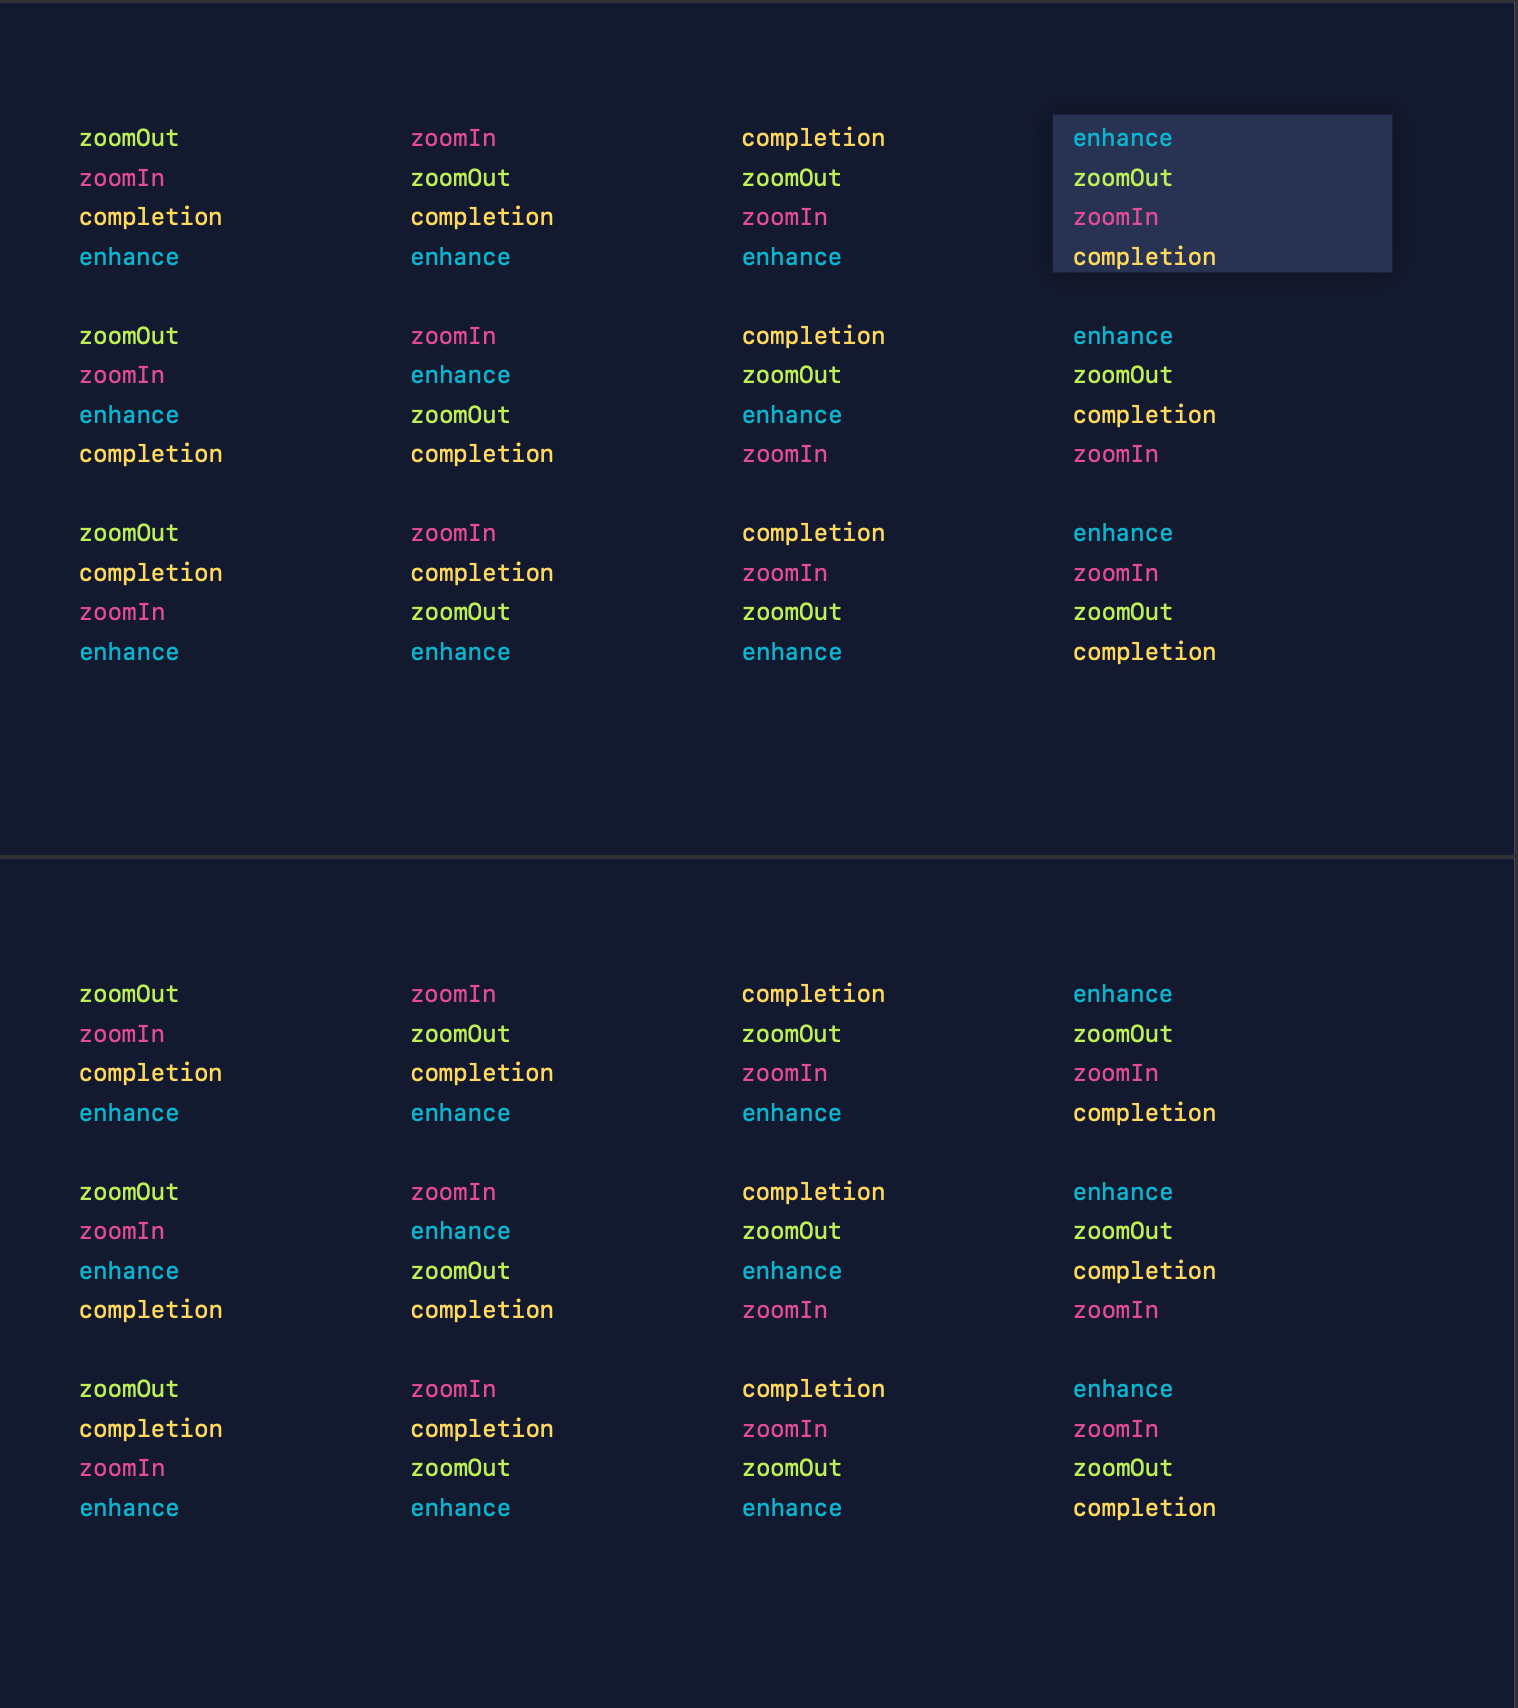
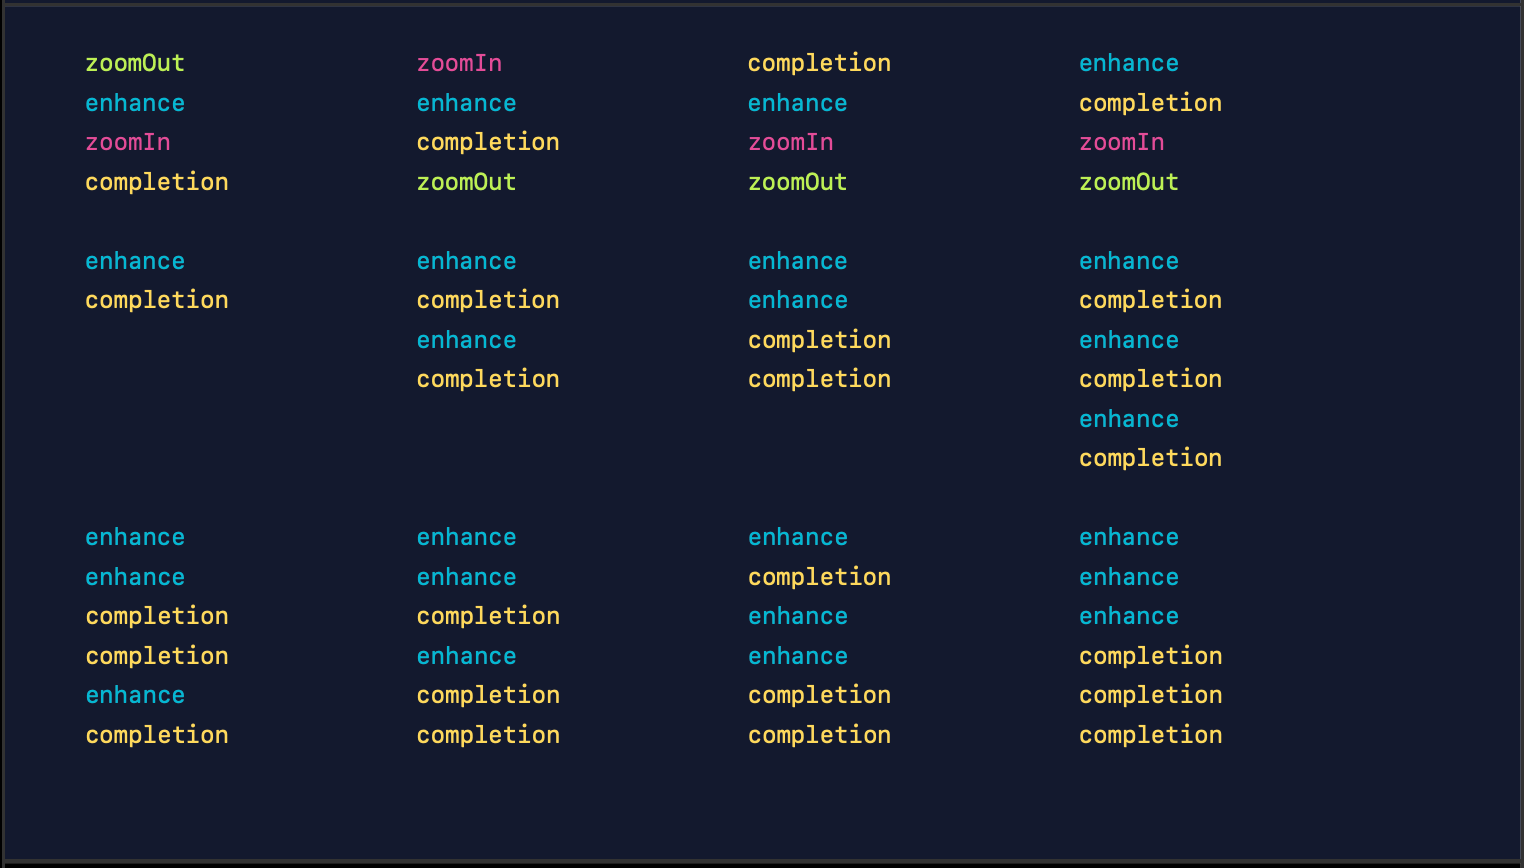
あるメソッドが特定の実行順番でバグることがあった。4つのメソッドだけでも4!で24通り、非同期処理でメソッドが何度も叩かれると指数関数的に順序組み合わせが爆発してしまう。
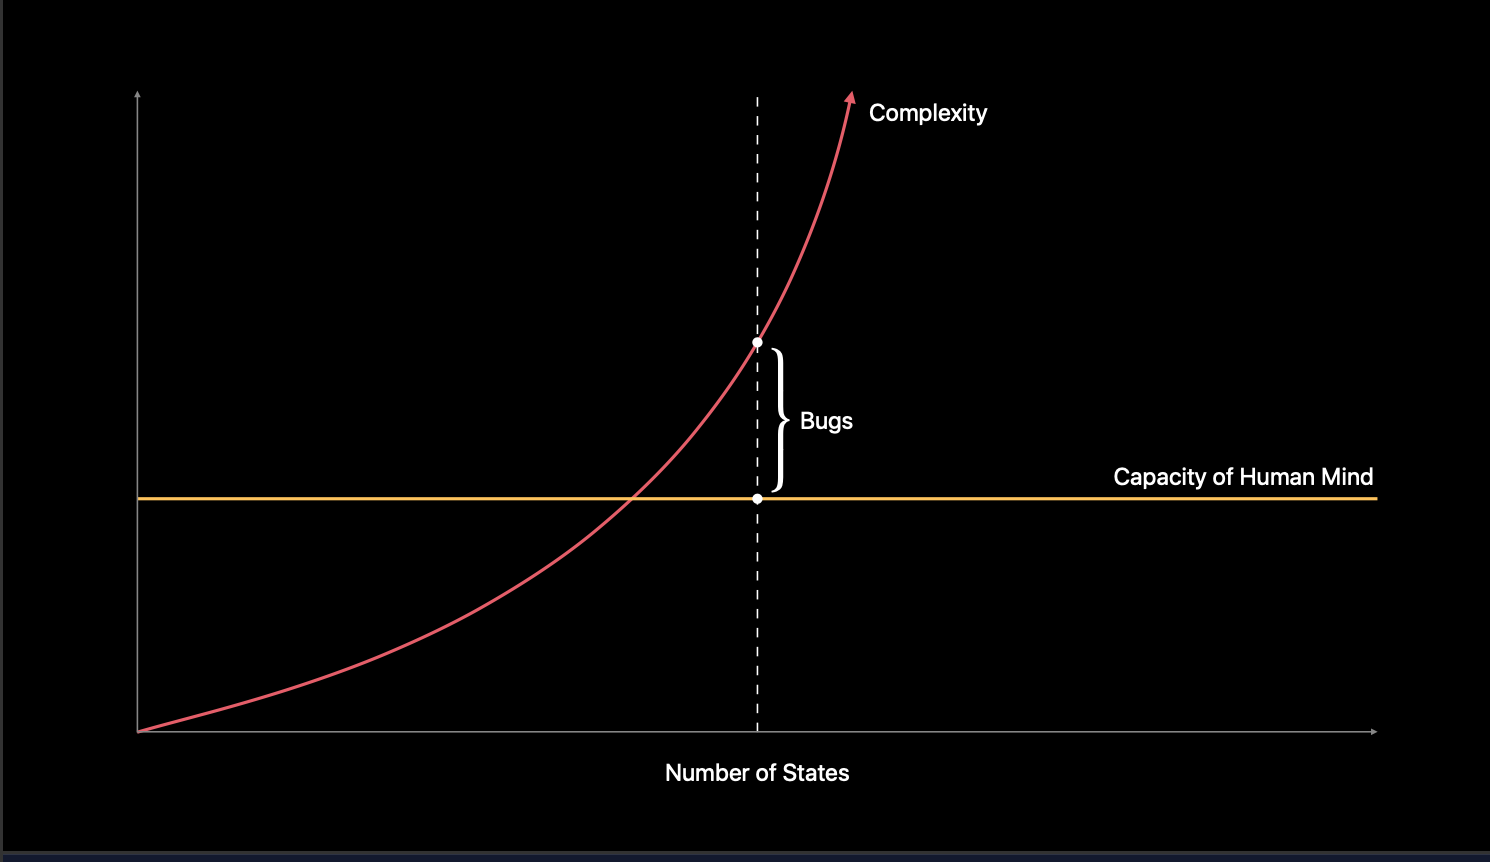
結果、複雑性が人間のキャパシティを超えてバグが生まれてしまう。
Source of Truth(単一データソース)とDerived Value(派生データソース)
ビューをデータの矛盾なく表示するにはSource of TruthとDerived Valueの考えが重要。

画像タップでズームするかどうかのフラグを例にするとzoomedフラグはSource of TruthでAspectRatioのcontentModeがDerived Value。
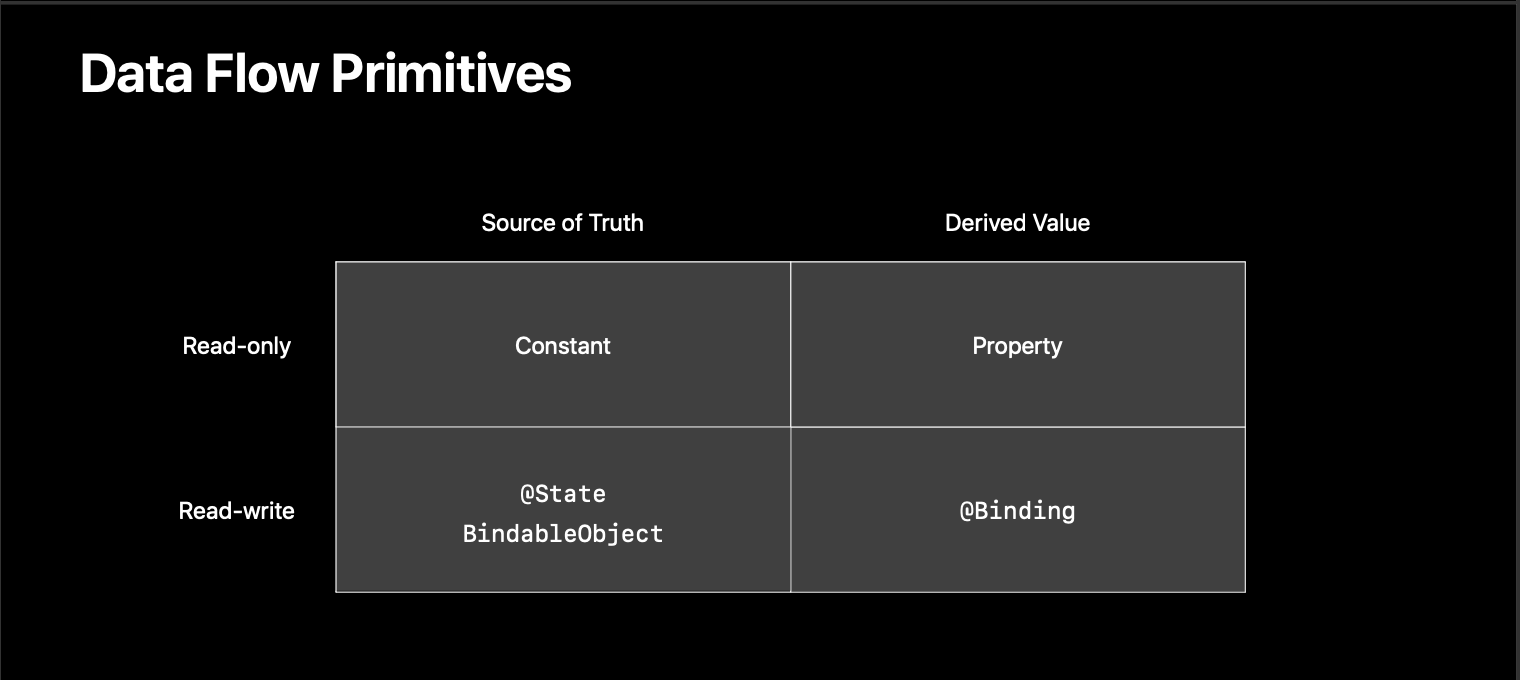
Source of Truth(単一データソース)とDerived Value(派生データソース)とRead OnlyかRead-writeなのかのマトリックスでまとめた図が上記です。
従来のモデルデータはSwiftUIでは@Bindingとして扱える。
SwiftUIはSource of Truthをコンセプトの一つにしており、UI上のデータ不整合がなくなるように設計されている。
@Stateのプロパティが変更されたらビューが自動的に更新されるなどがその一例。
まとめ
Introducing SwiftUIというタイトルの通り、デモアプリを作りながらSwiftUIのコンセプトを自然に、網羅的に説明するVideoでした。細かなアニメーションをする方法やナビゲーションビューの使い方が参考になりました。
宣伝
インプレスR&D社より、「1人でアプリを作る人を支えるSwiftUI開発レシピ」発売中です。
「SwiftUIでアプリを作る!」をコンセプトにSwiftUI自体の解説とそれを組み合わせた豊富なサンプルアプリでどんな風にアプリ実装すればいいかが理解できる本となっています。
iOS 14対応、Widgetの作成も一章まるまるハンズオンで解説しています。
SwiftUIを学びたい方、ぜひこちらのリンクをチェックしてください!